A new home for the turbo engine

I didn’t get any joy selling the engine and turbo conversion kit complete, largely because I didn’t try. It’s tricky to sell something that isn’t advertised. Still, there was only one thing for it. If nobody wanted to give the setup a new home, I’d give a new home to it!

Cue a 1999 JDM MX5. Sorry, Eunos.

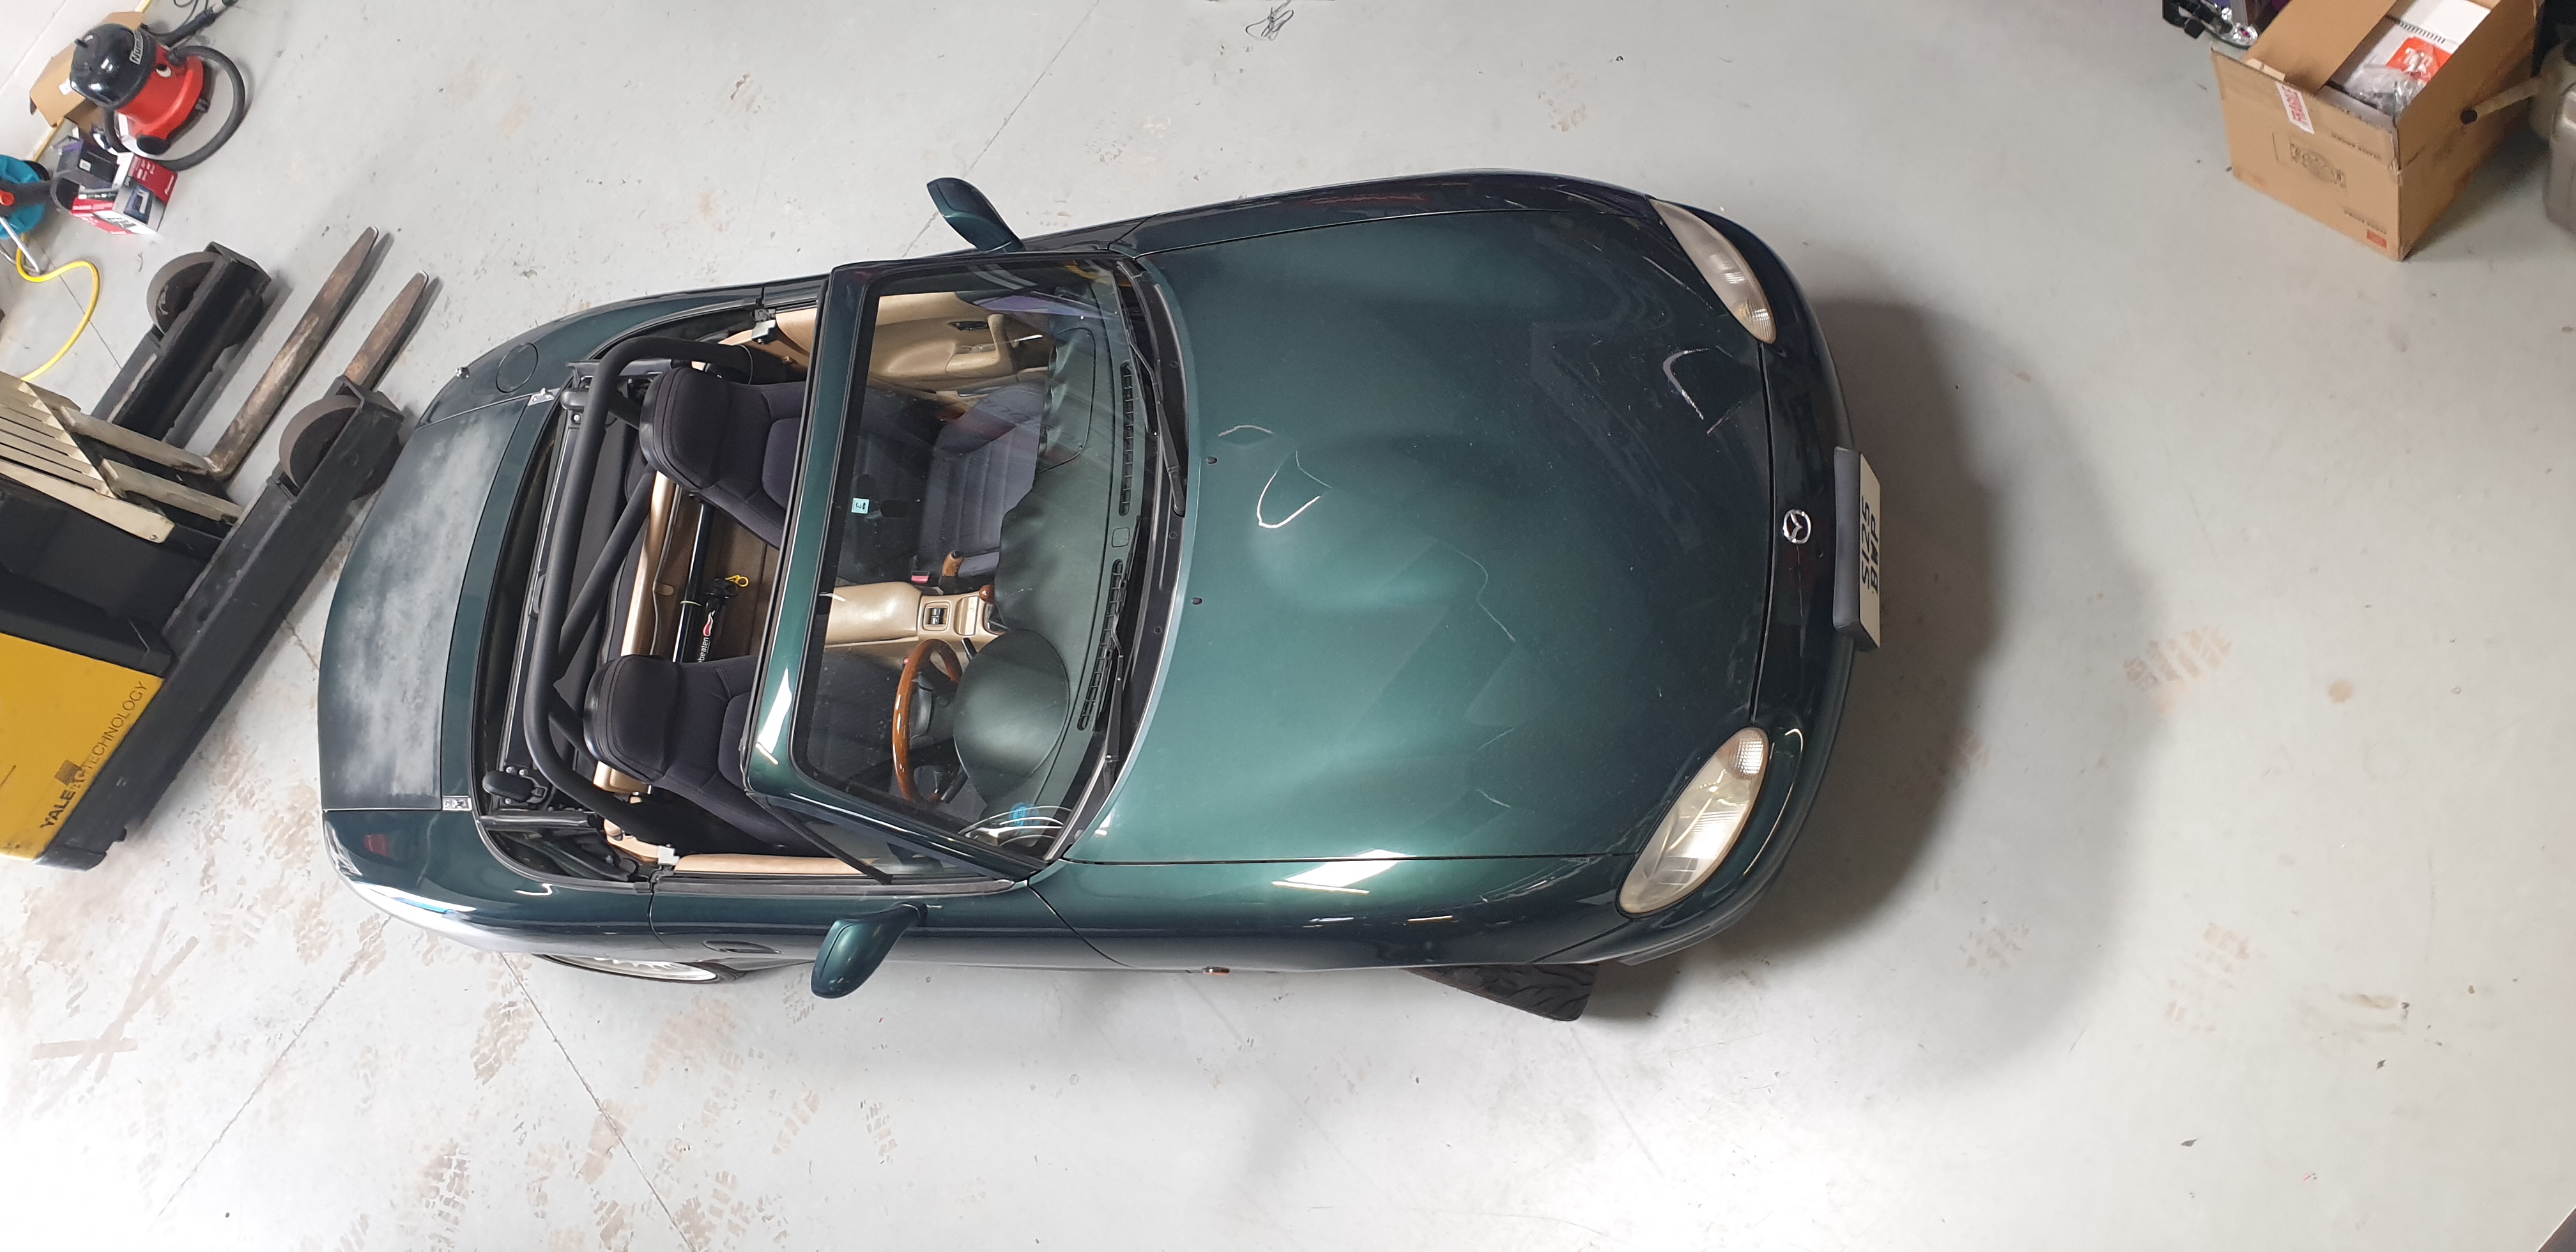
Isn’t it splendid! I particularly like the patina on the bootlid. It’s gone grey on top, something I appear to be doing at an alarming speed.

Really of course, I didn’t buy it for its middle aged bootlid. Nor because of a mid-life crisis, the Westfield still screams that the loudest. Instead it is an awesome collection of parts. Some it can keep, some I won’t need, and some will even make its way onto the Westfield. Let’s start running through them:

Slightly mismatched interior

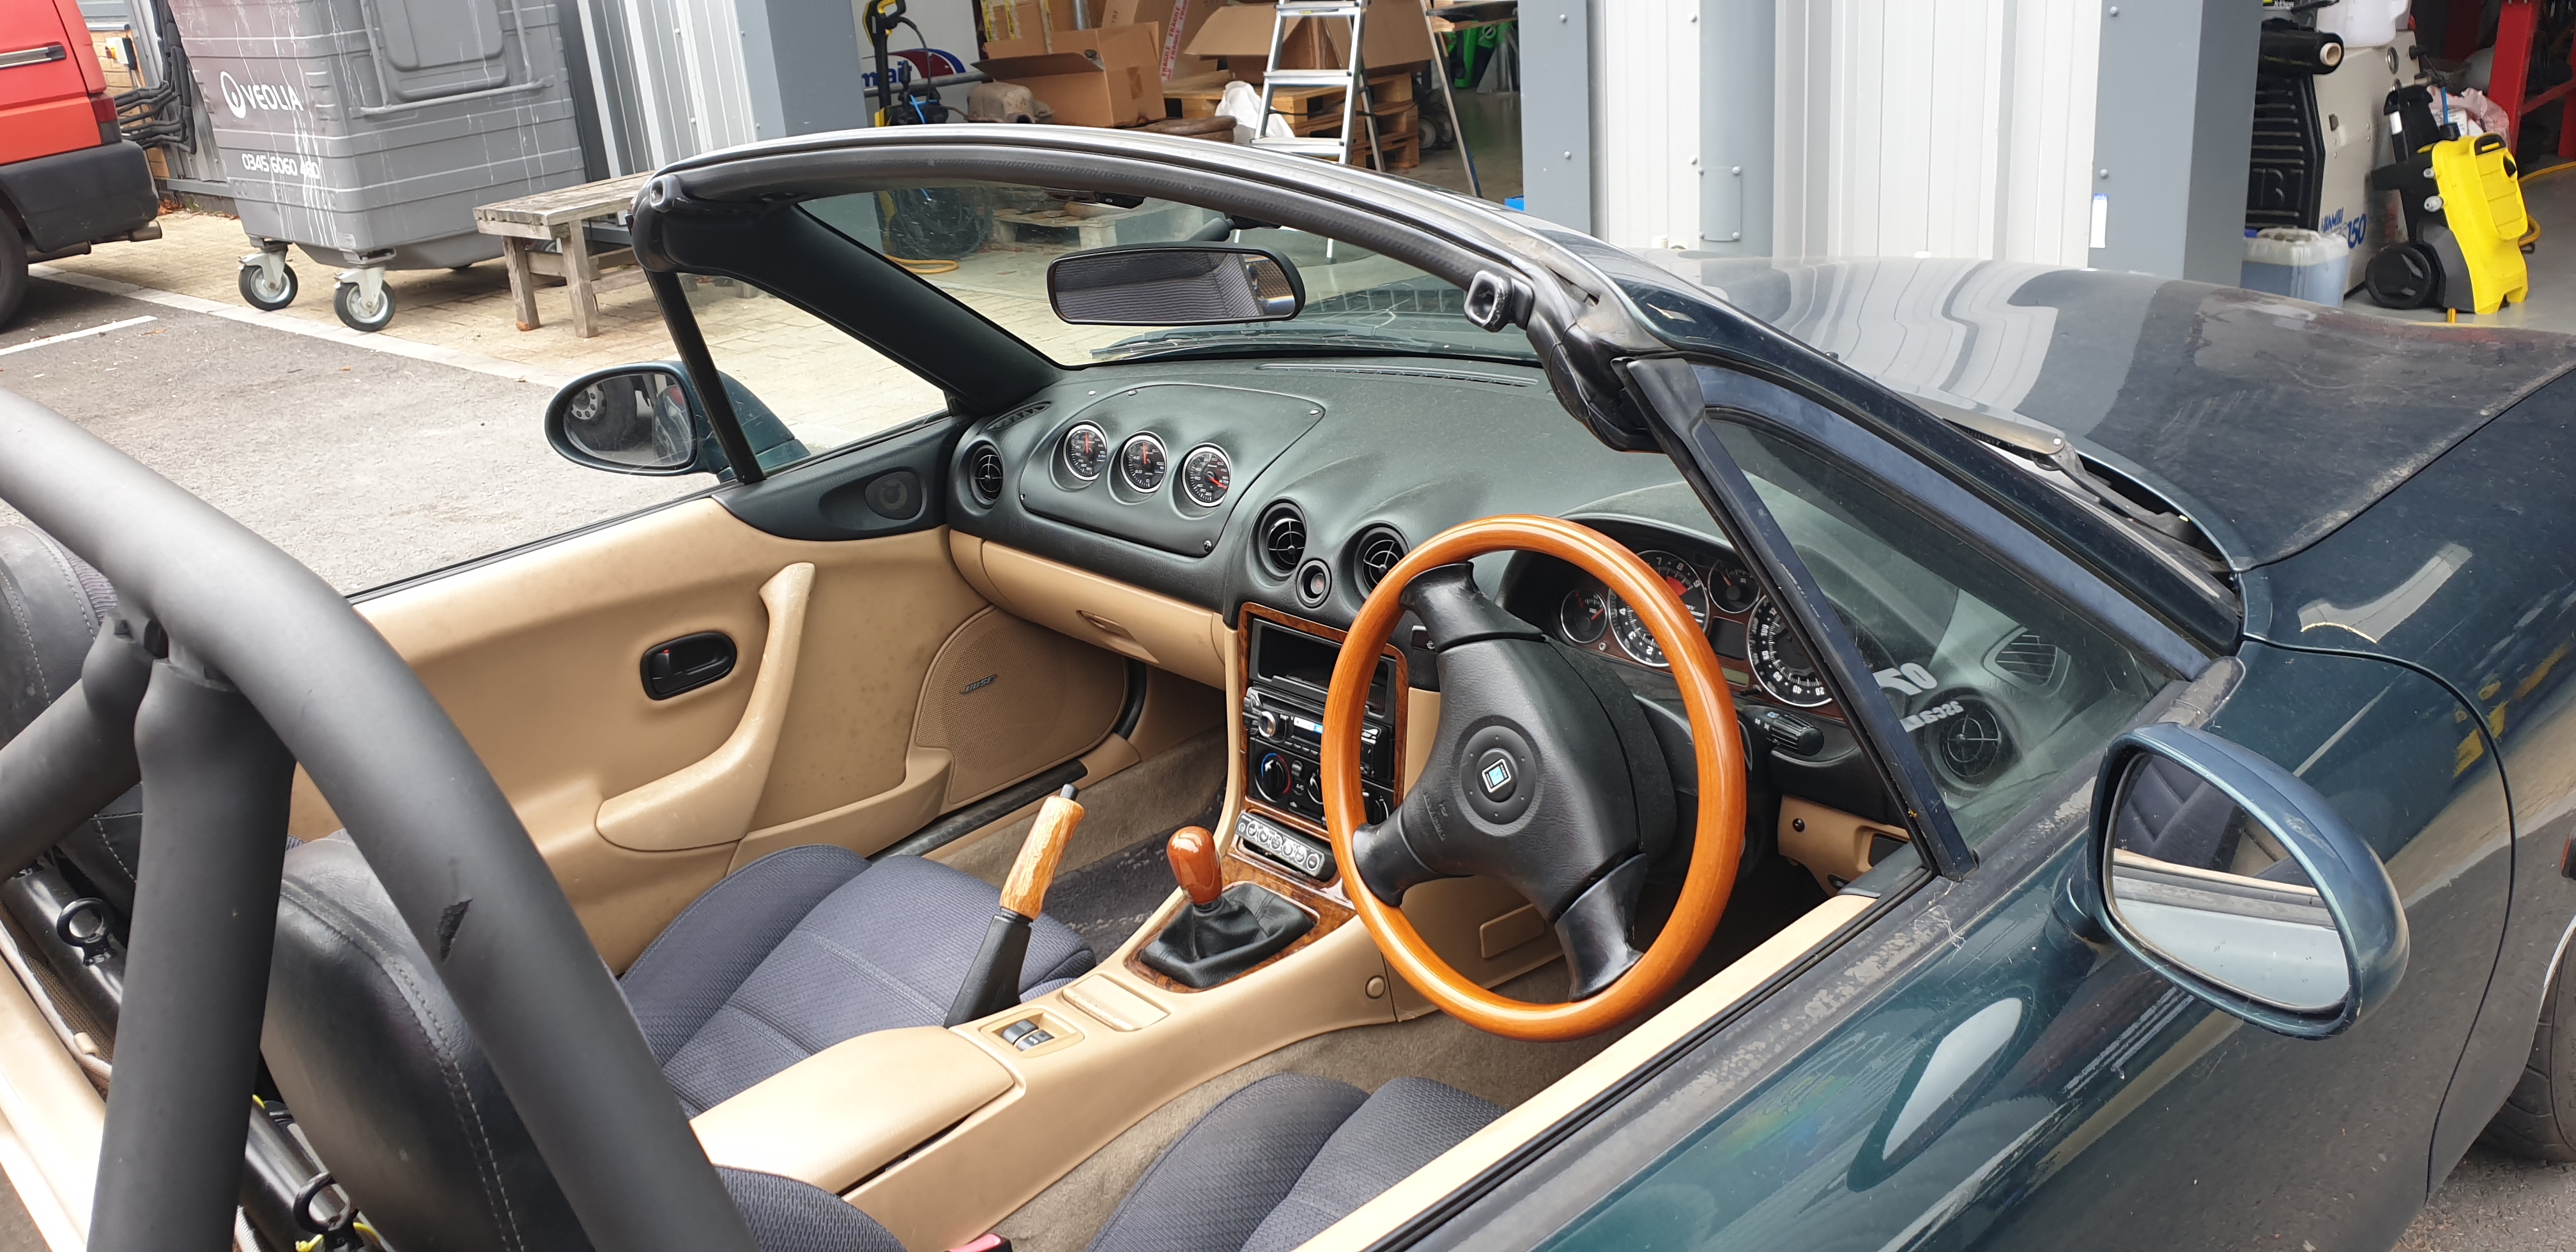
That’s perhaps the tidiest aftermarket gauge install I’ve seen in an MX-5. It’s a bit of a shame the screws are showing (well, one of them isn’t because it’s in the glovebox), but otherwise it’s a neat way of fitting gauges that don’t need to be in line of sight. There’s three Defi gauges in there, water temp, oil temp and oil pressure. Unfortunately the plug is broken on the oil pressure gauge but should be an easy fix if I ever get around to it. They can stay in the MX-5 as they’re always useful.

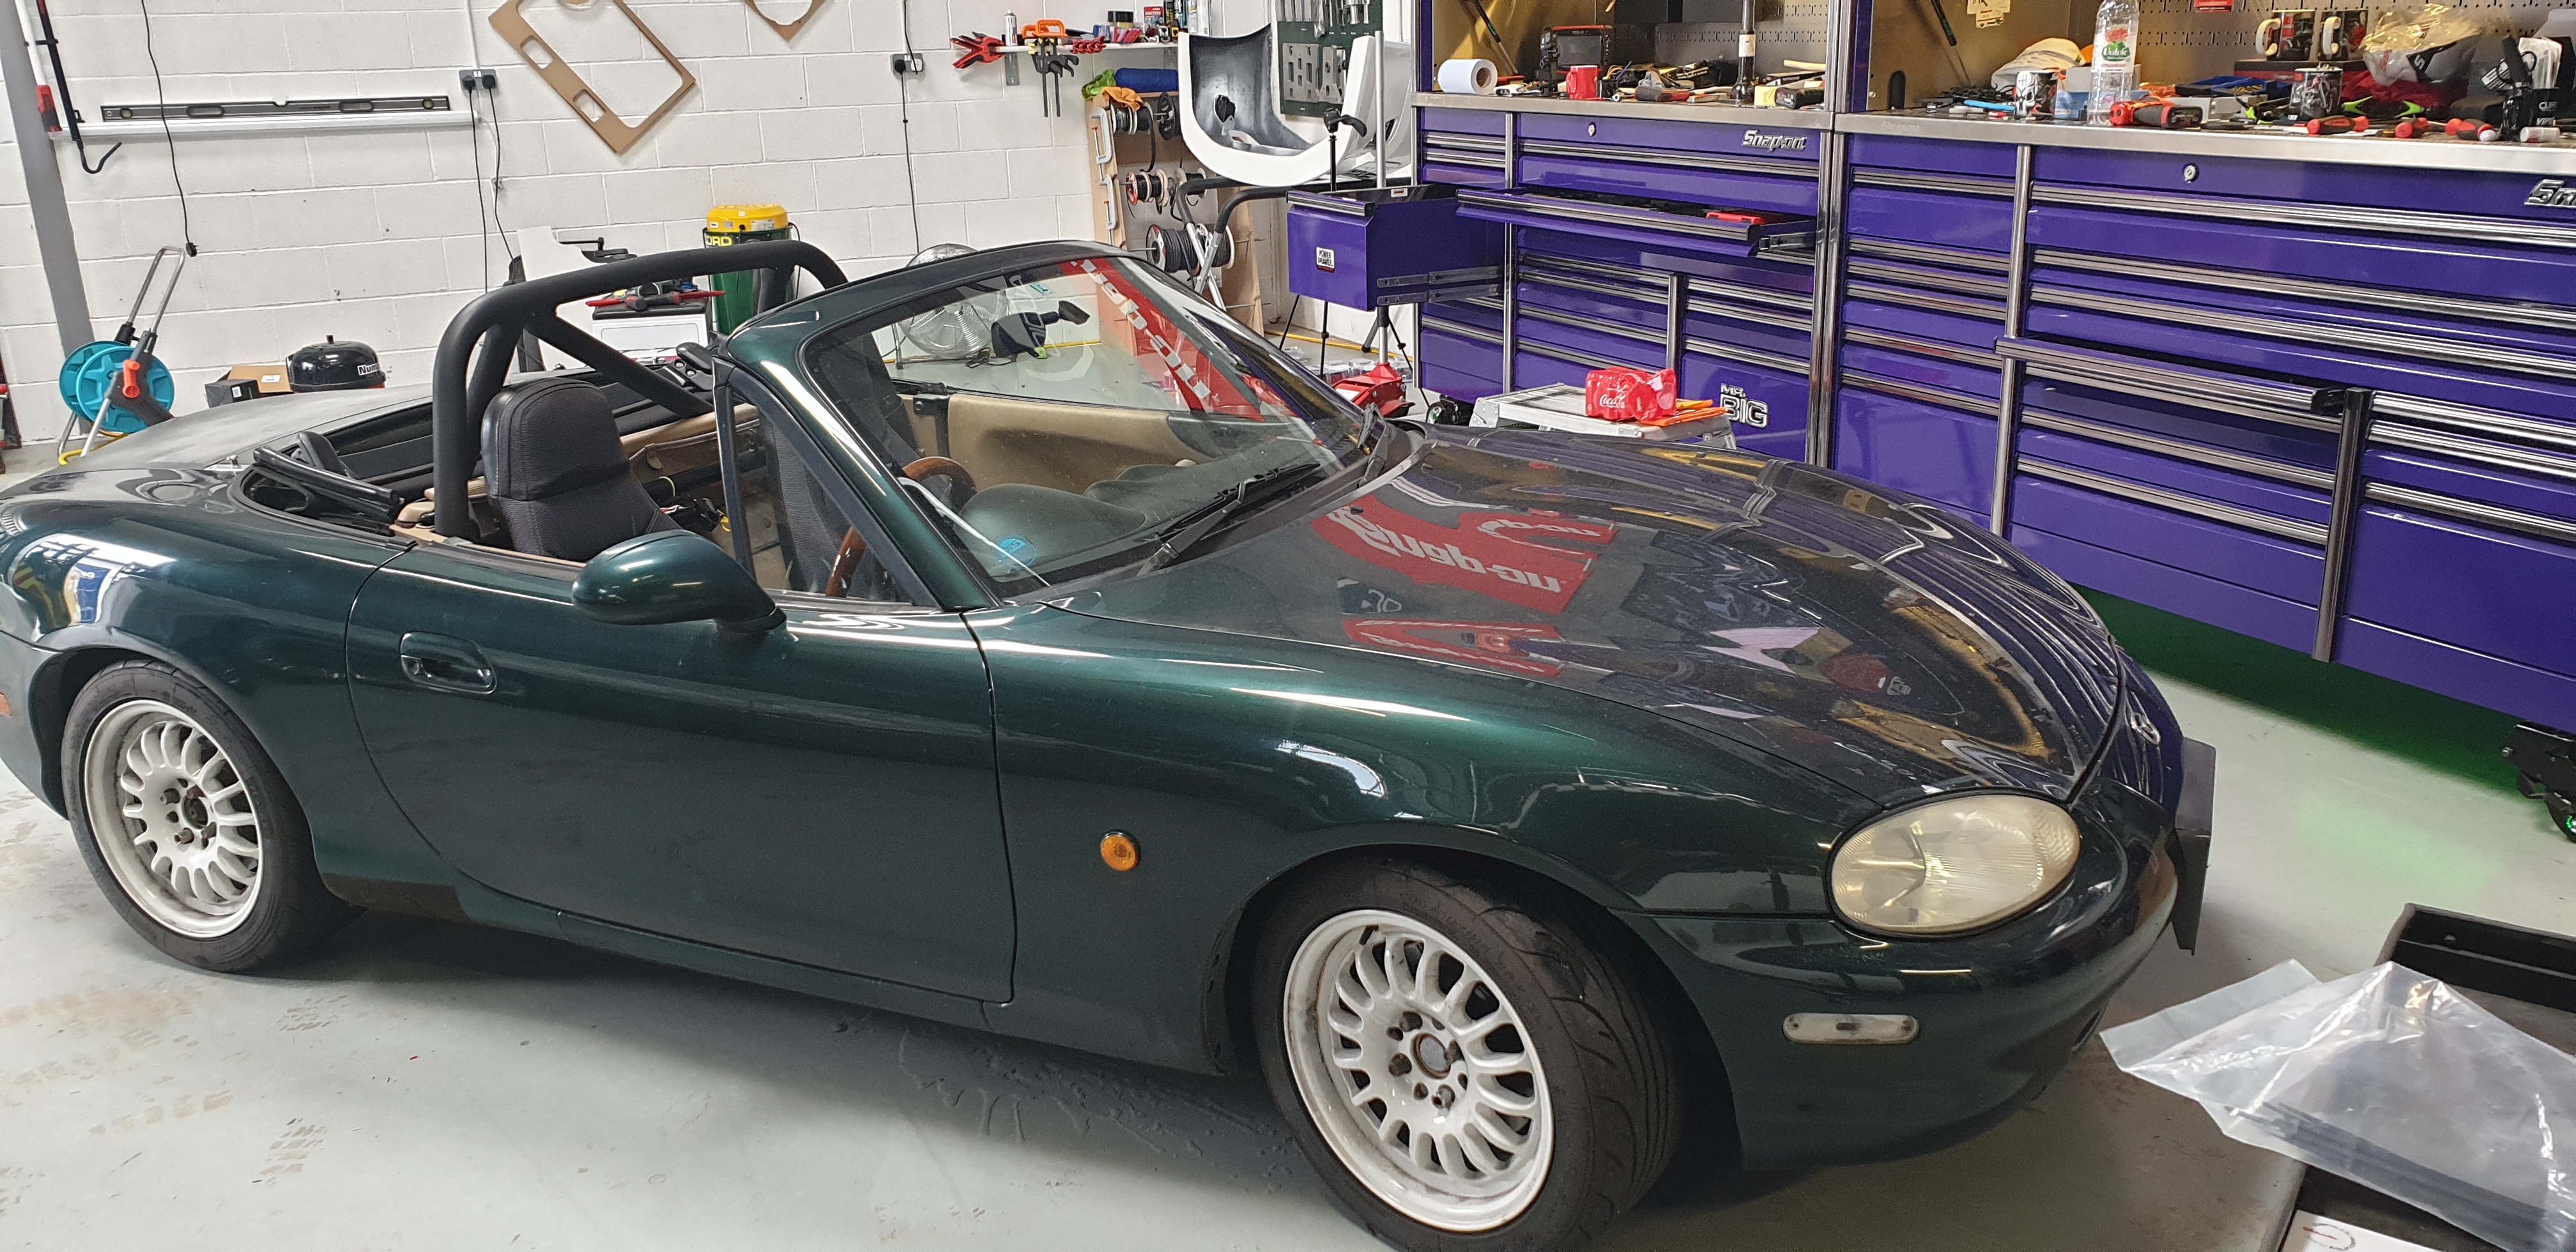
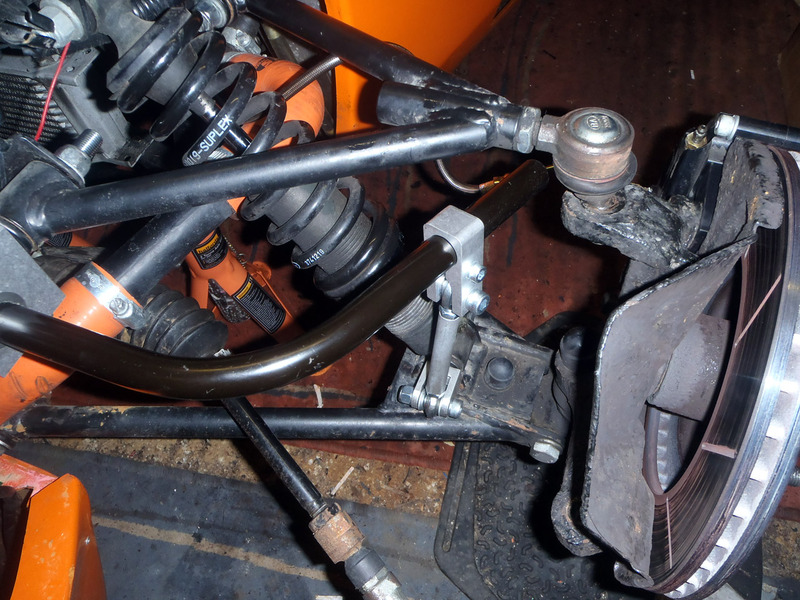
Yep, those slightly dirty Rota wheels are the ones that I sold not so long ago. They’re not the only bit of Westfield history to be on that car either. I’m not sure on the make of the rollbar, but it’s a pretty tidy and sturdy looking effort. I’m not planning on testing it out though. Under the arches is a set of Tein coilovers which do a good job of improving the handling without ruining the ride. They’re firm, but not as firm as the OEM suspension on my R53 Mini. That’s ridiculous! The suspension has been well aligned too, giving a positive turn in which is what I prefer in a car.

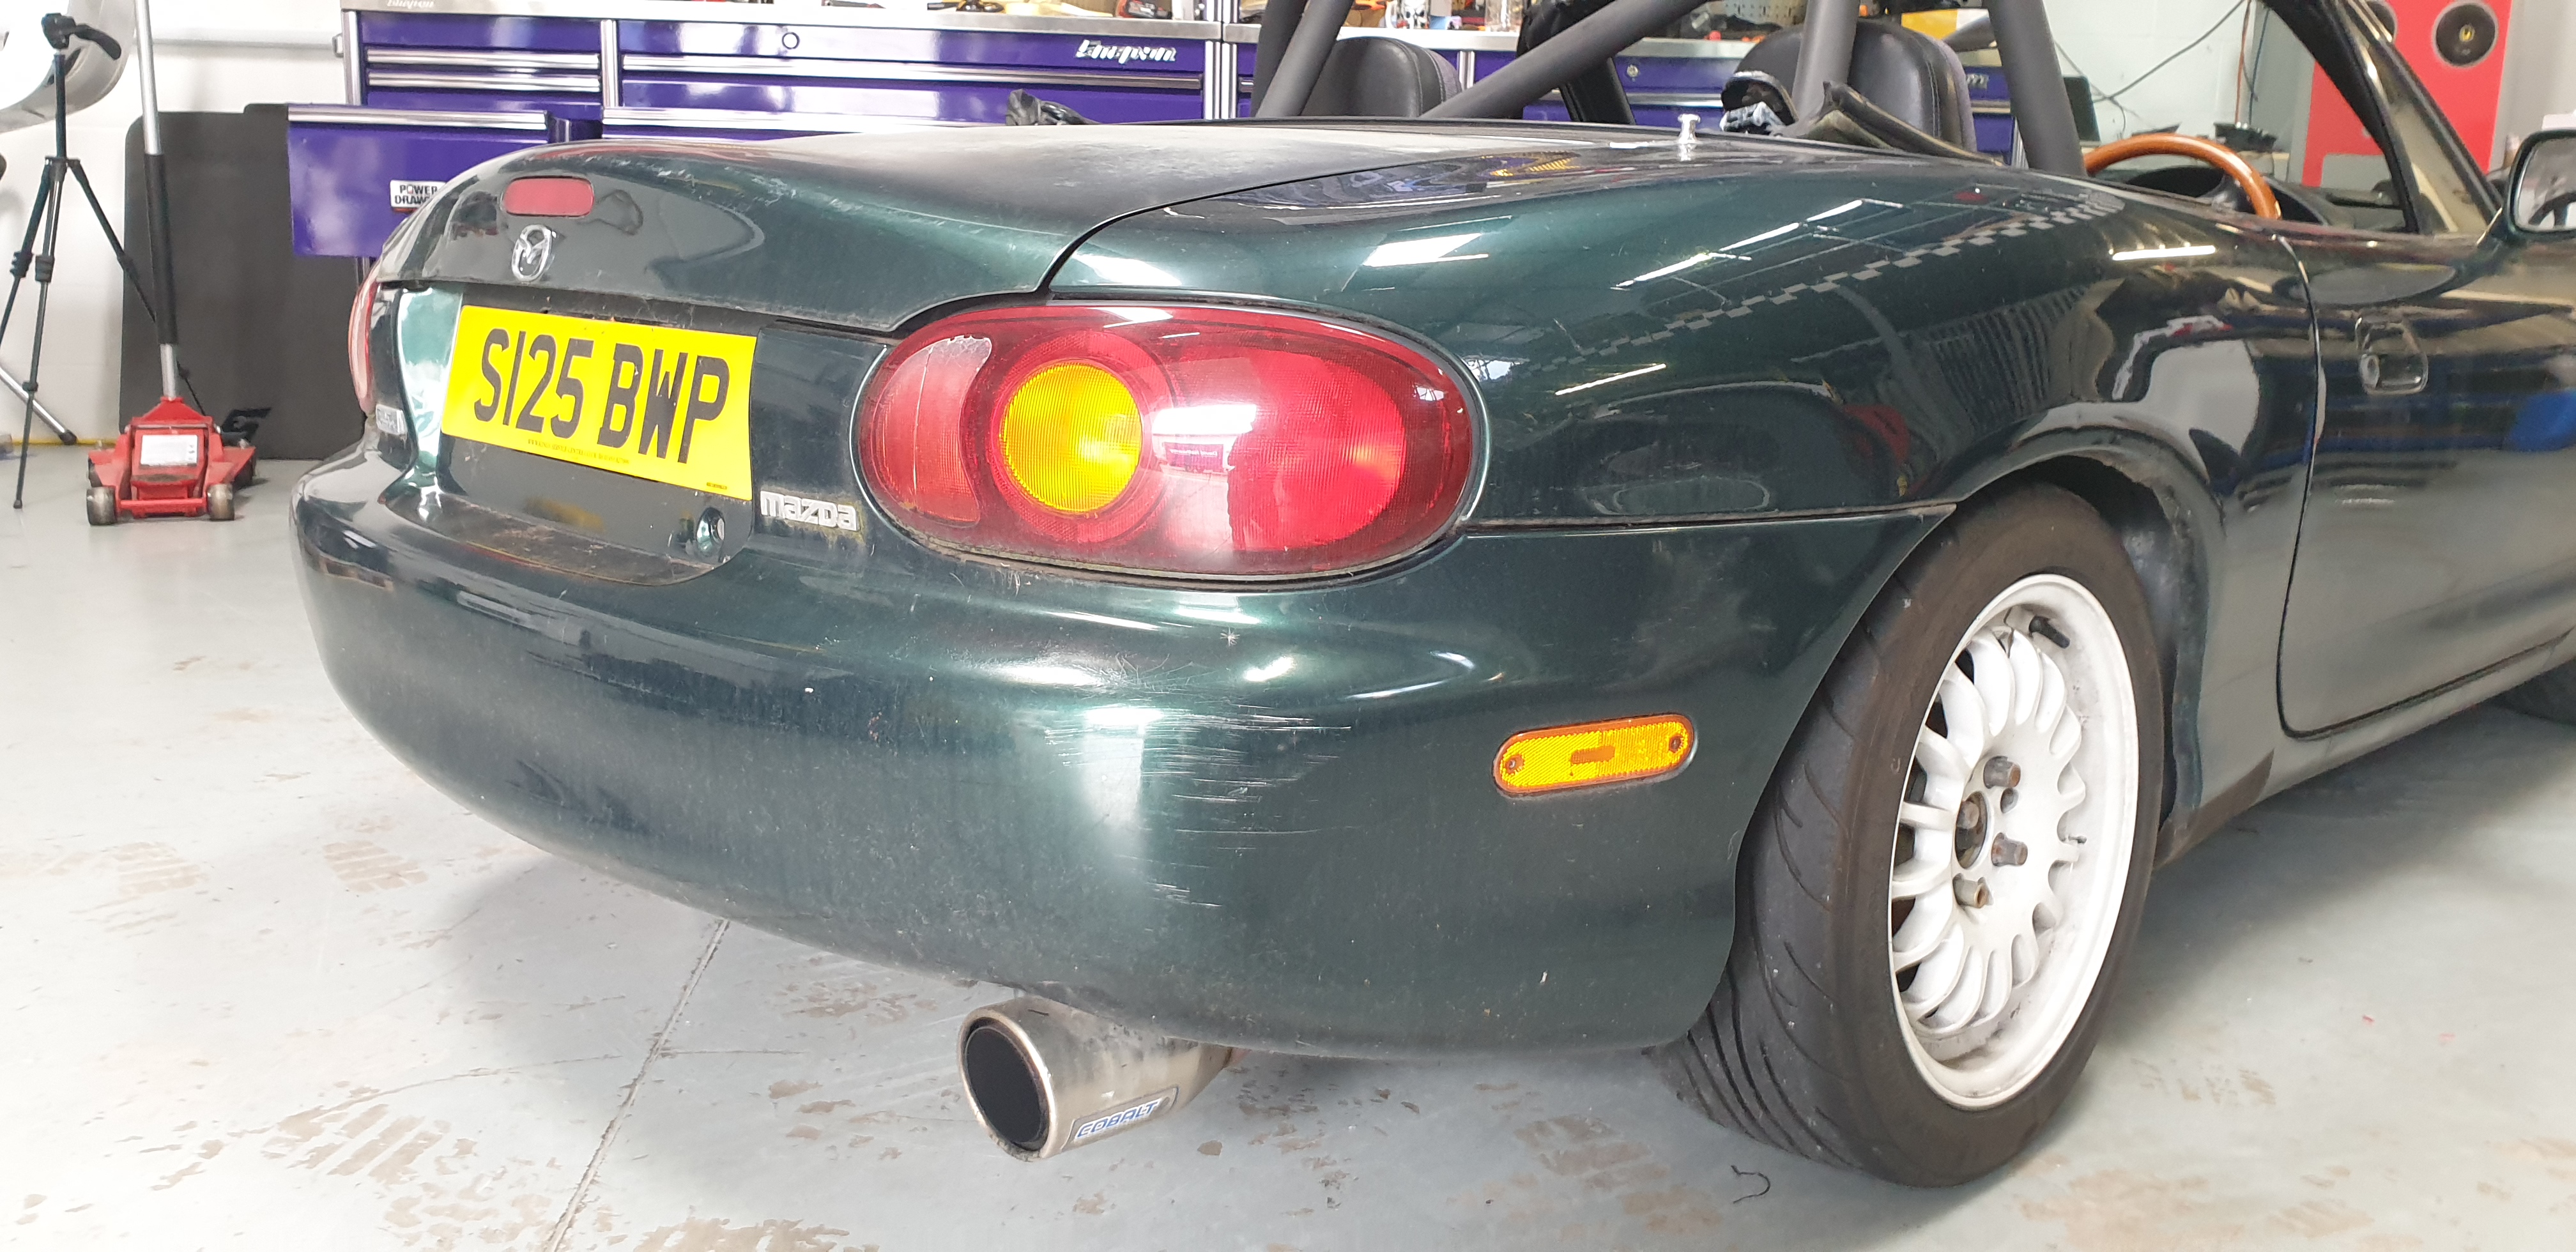
At the back there’s a Cobalt exhaust which sounds great. Not a hint of raspiness, and also not particularly loud. I don’t know what diameter the pipework is but I’m hoping I can keep it.

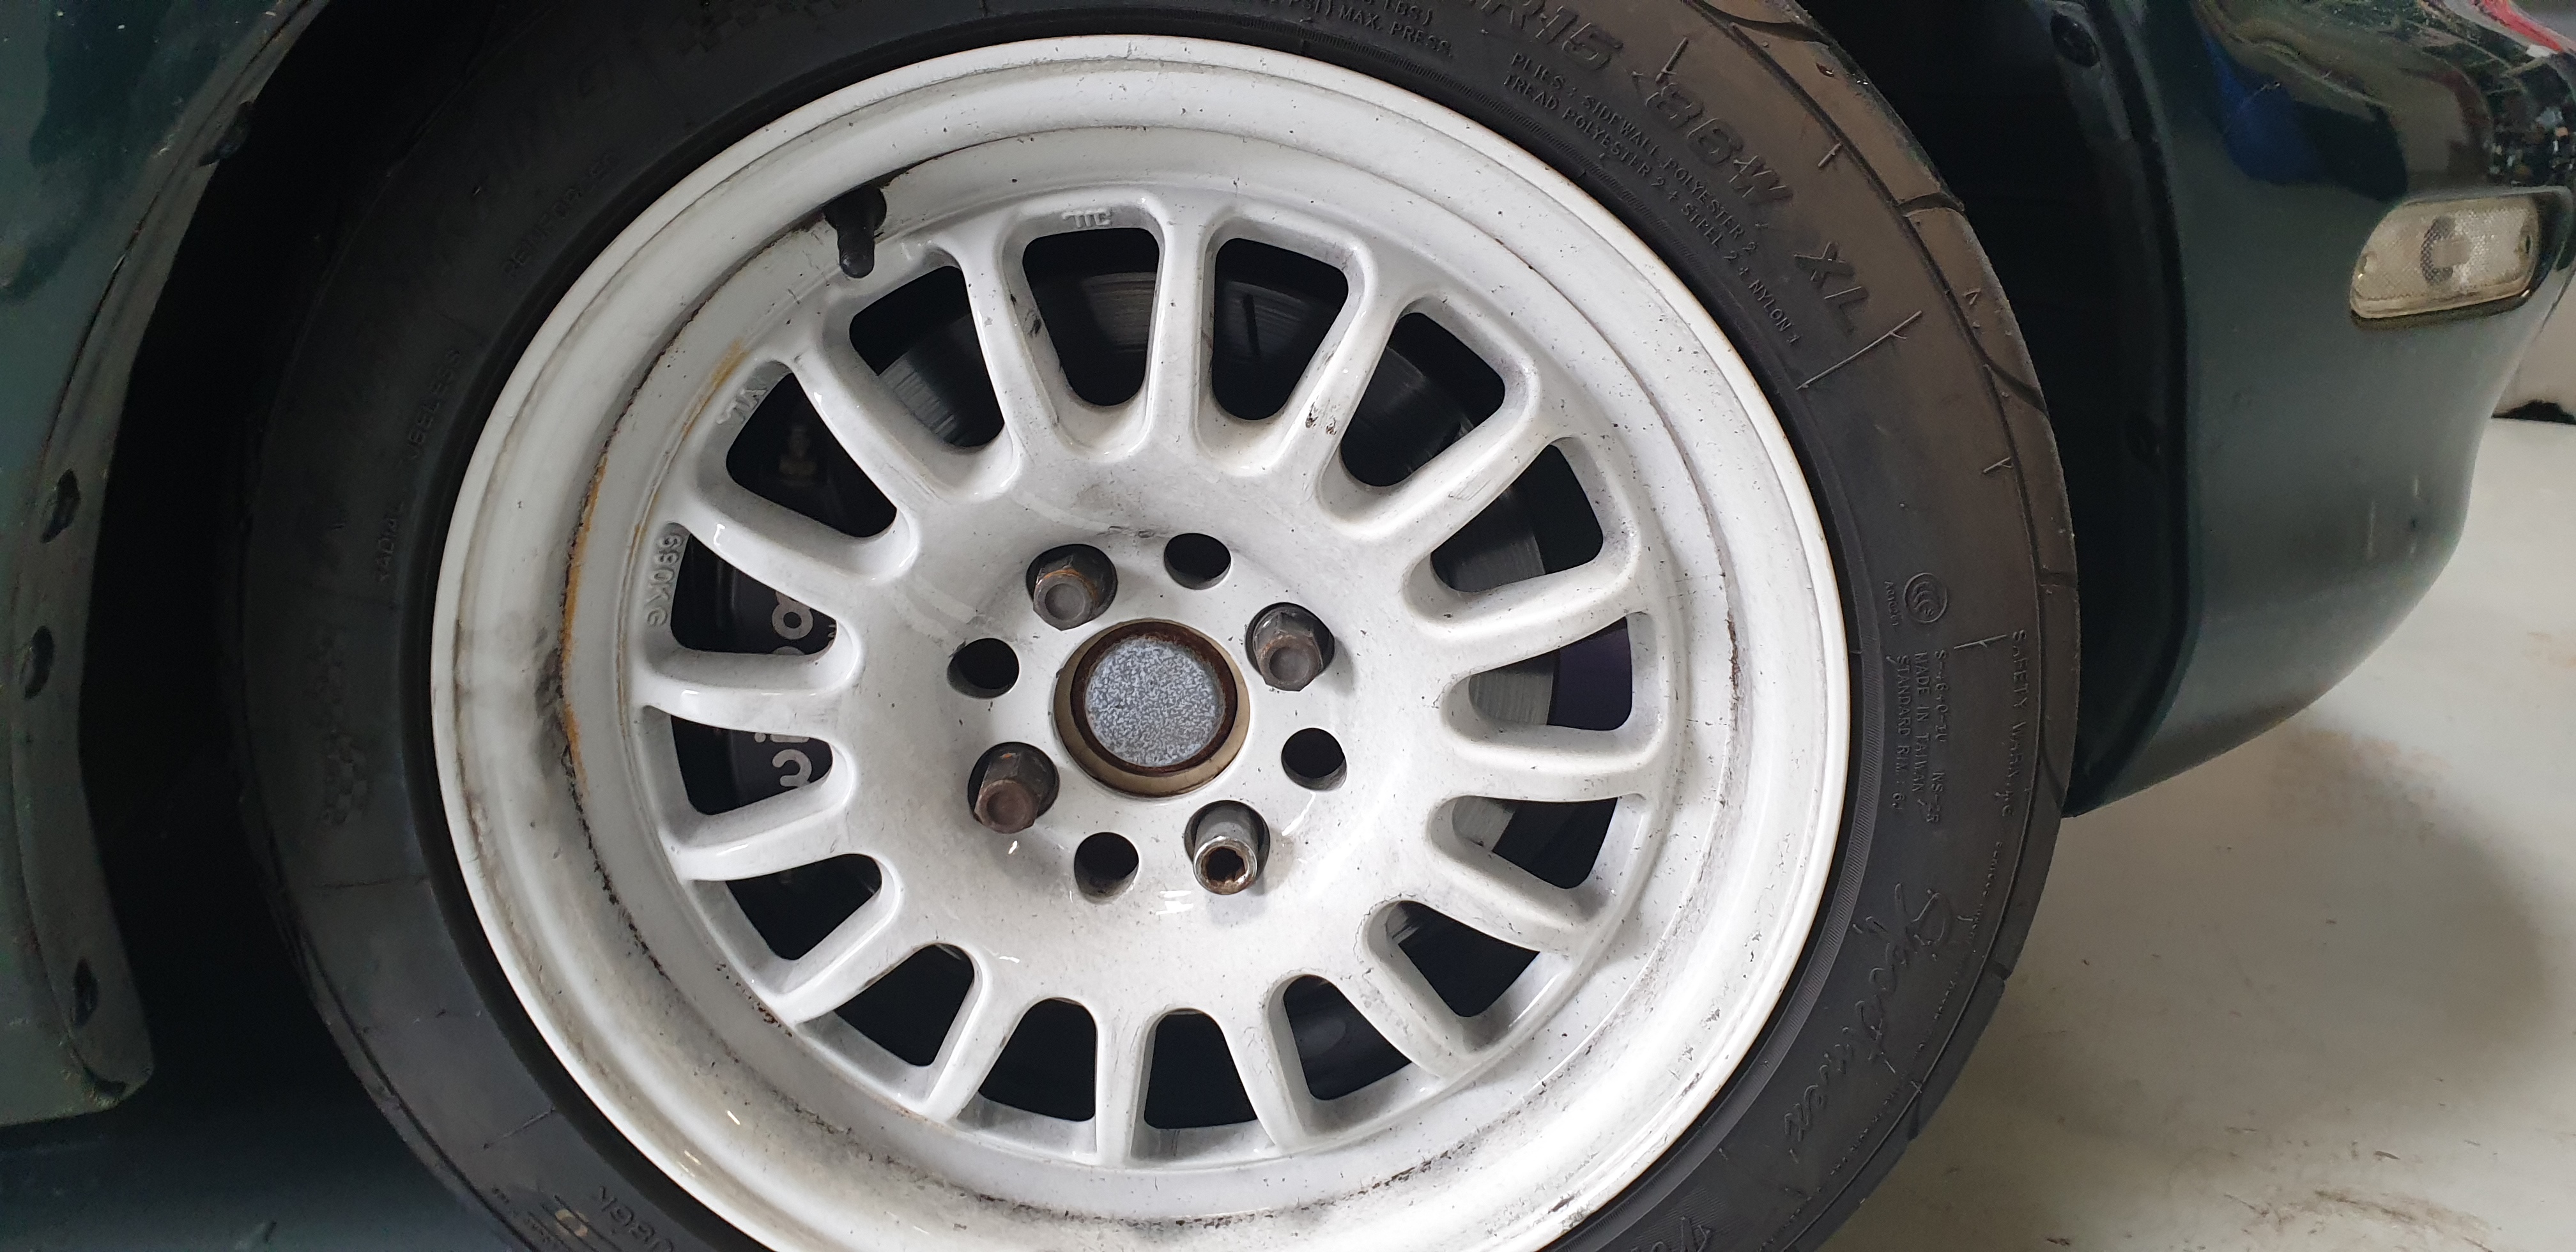
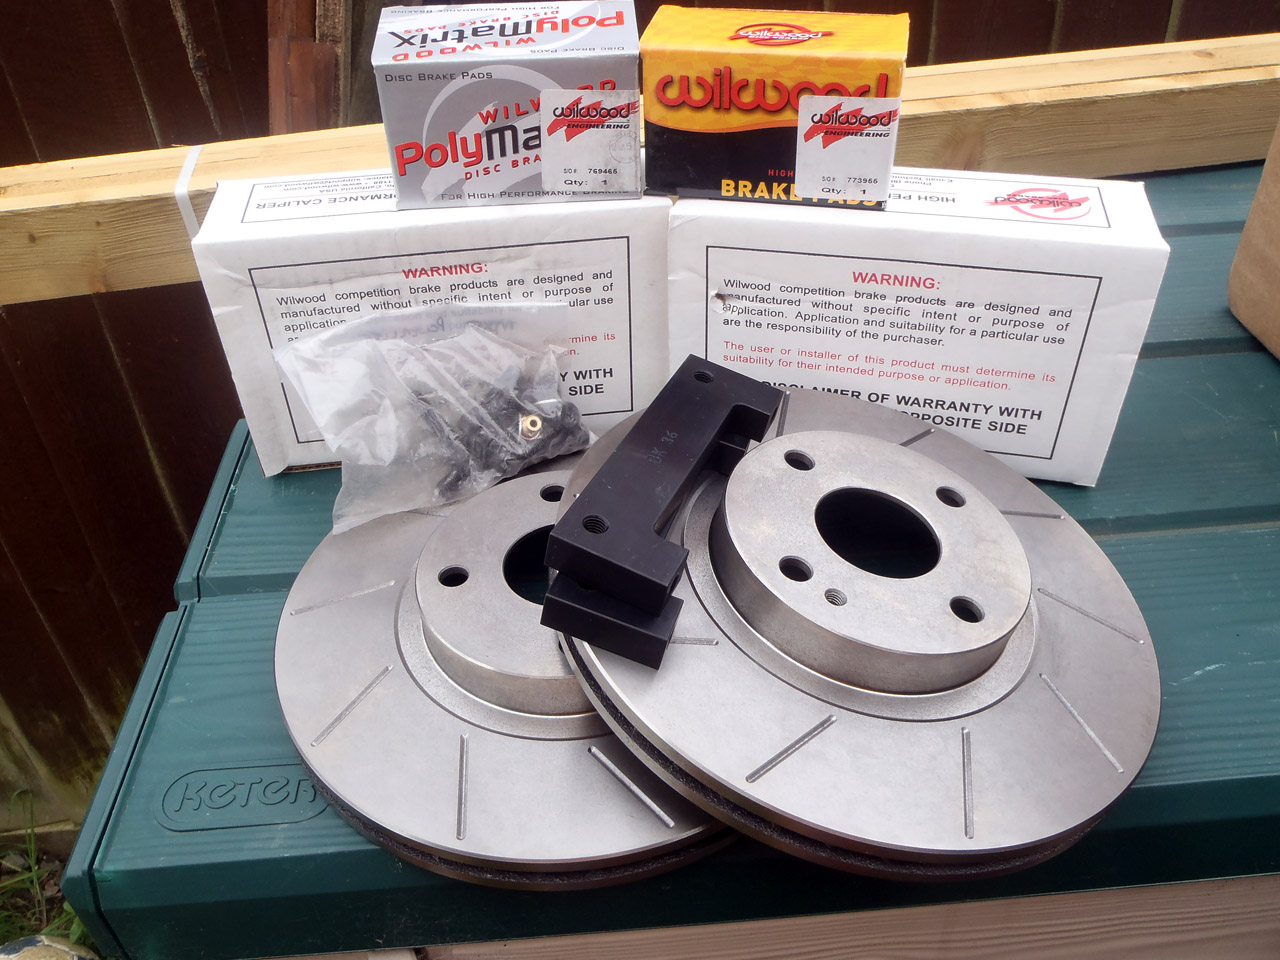
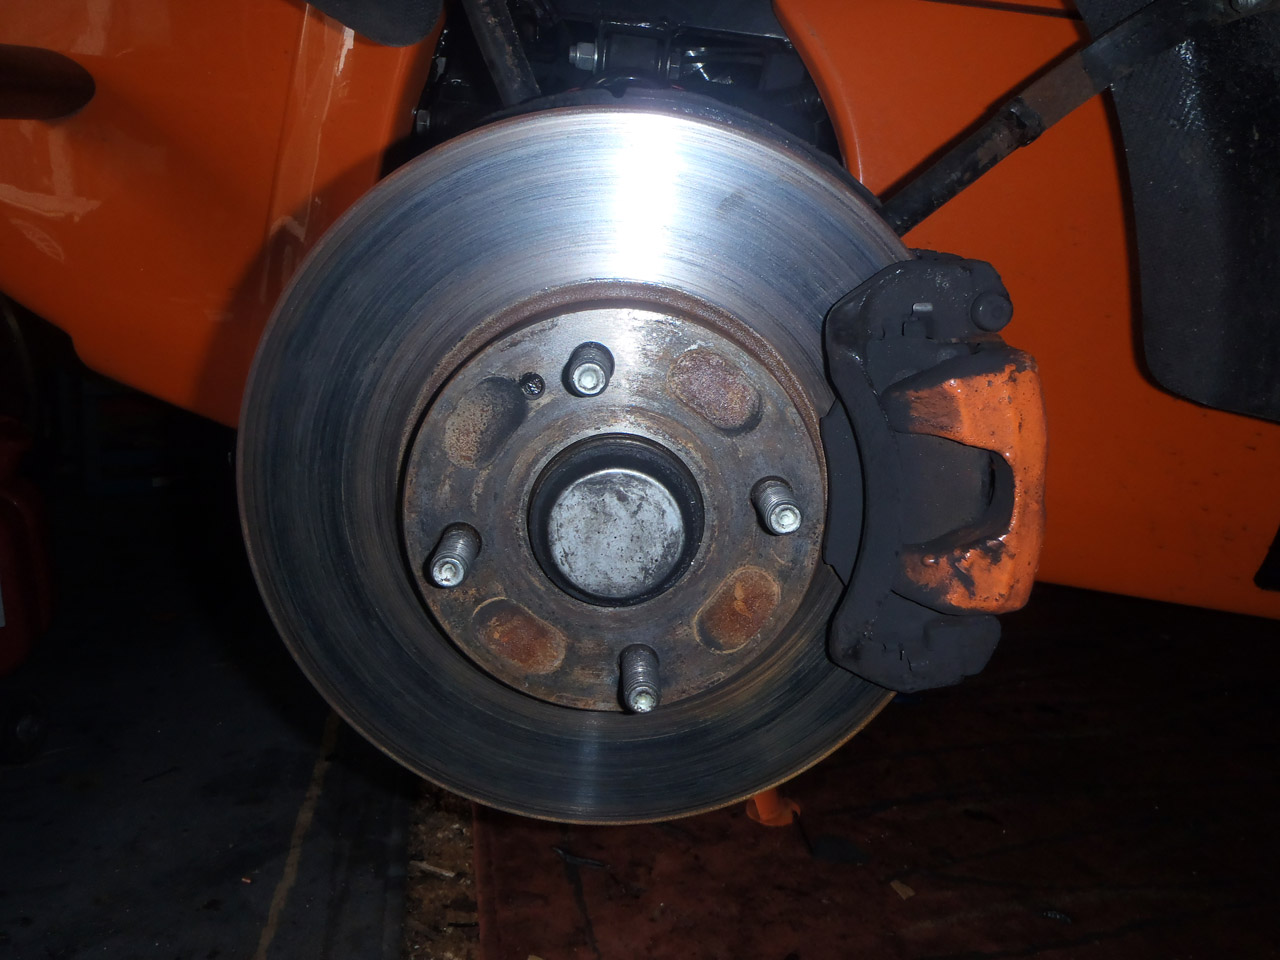
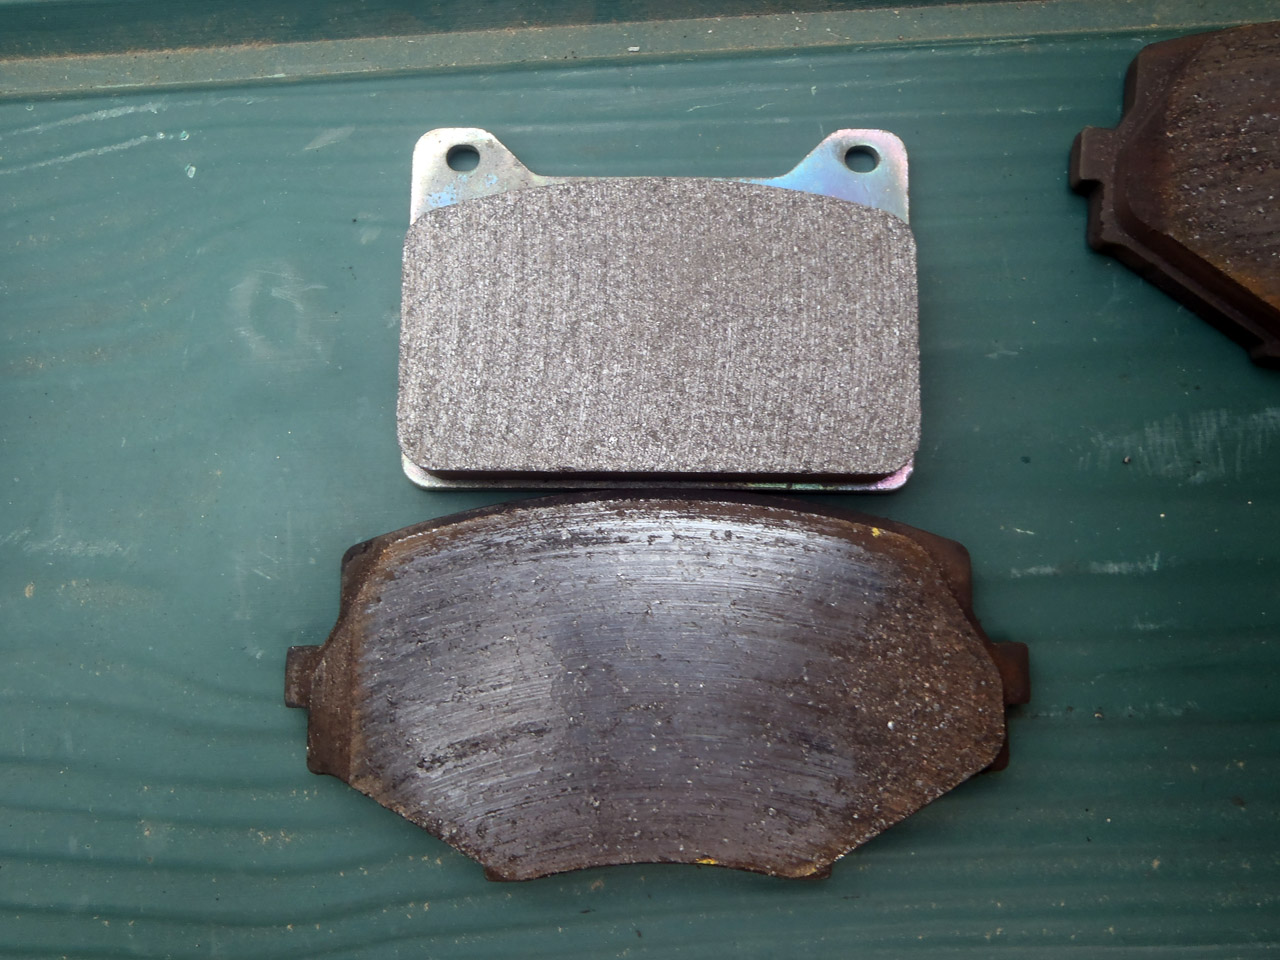
And a bit of a dark photo but under the front wheels is the Wilwood 276mm kit that I sold after going down to standard 1.8 size on the Westfield.

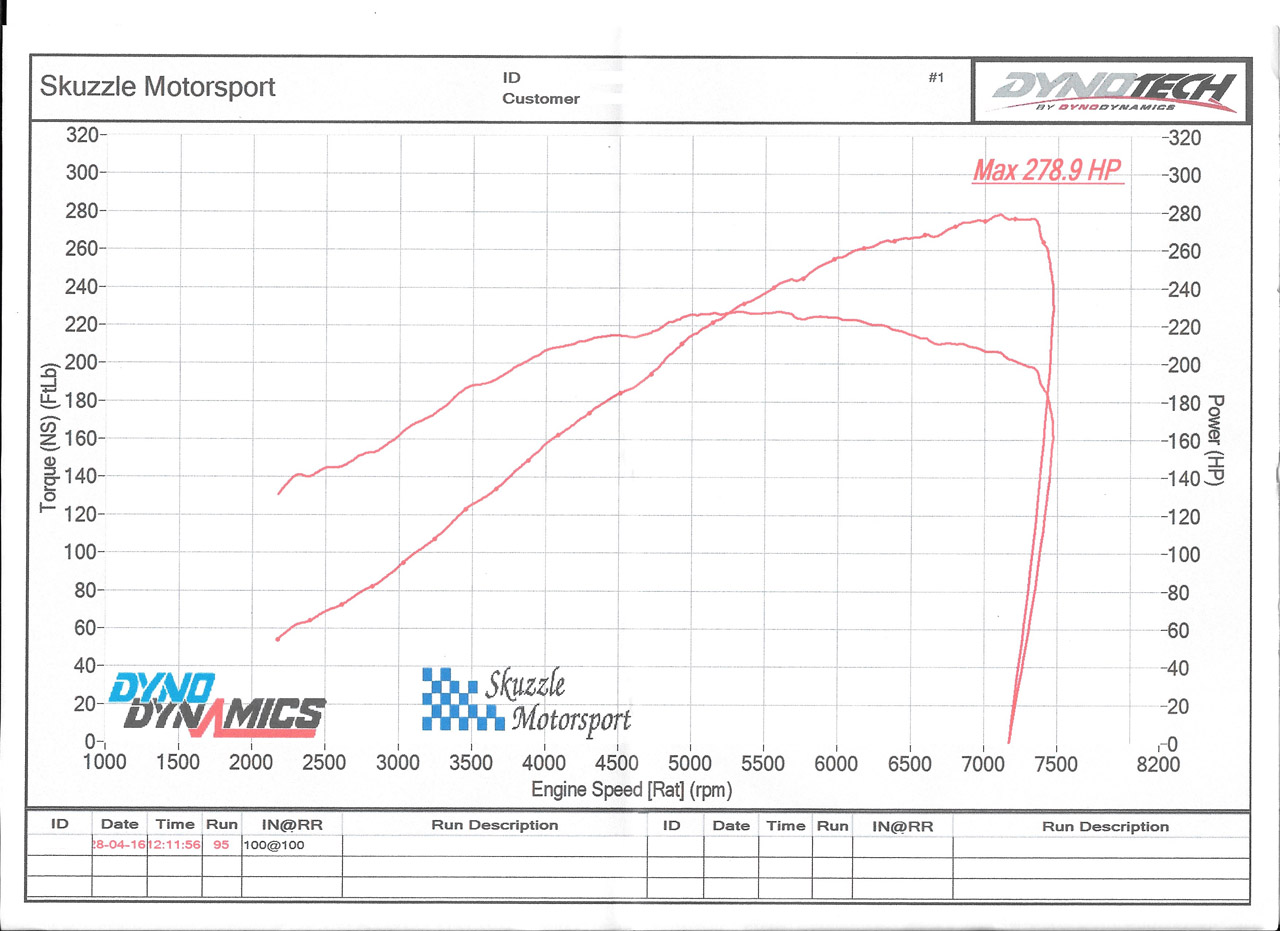
Under the bonnet there’s some bracing (it’s on the rear too), a cold air fed induction kit and a Jasma 4-1 manifold. There’s still a catalytic converter under there to keep the MOT man happy. Given all those mods, the car makes pretty much exactly standard power. You’ll never gain much with induction and exhaust mods (throttle bodies aside), but I’m surprised those red pipes haven’t added power! It’s mated to a 6 speed box though I’ll probably still keep the torque low when I fit the turbo engine, much like I did with the Westfield.

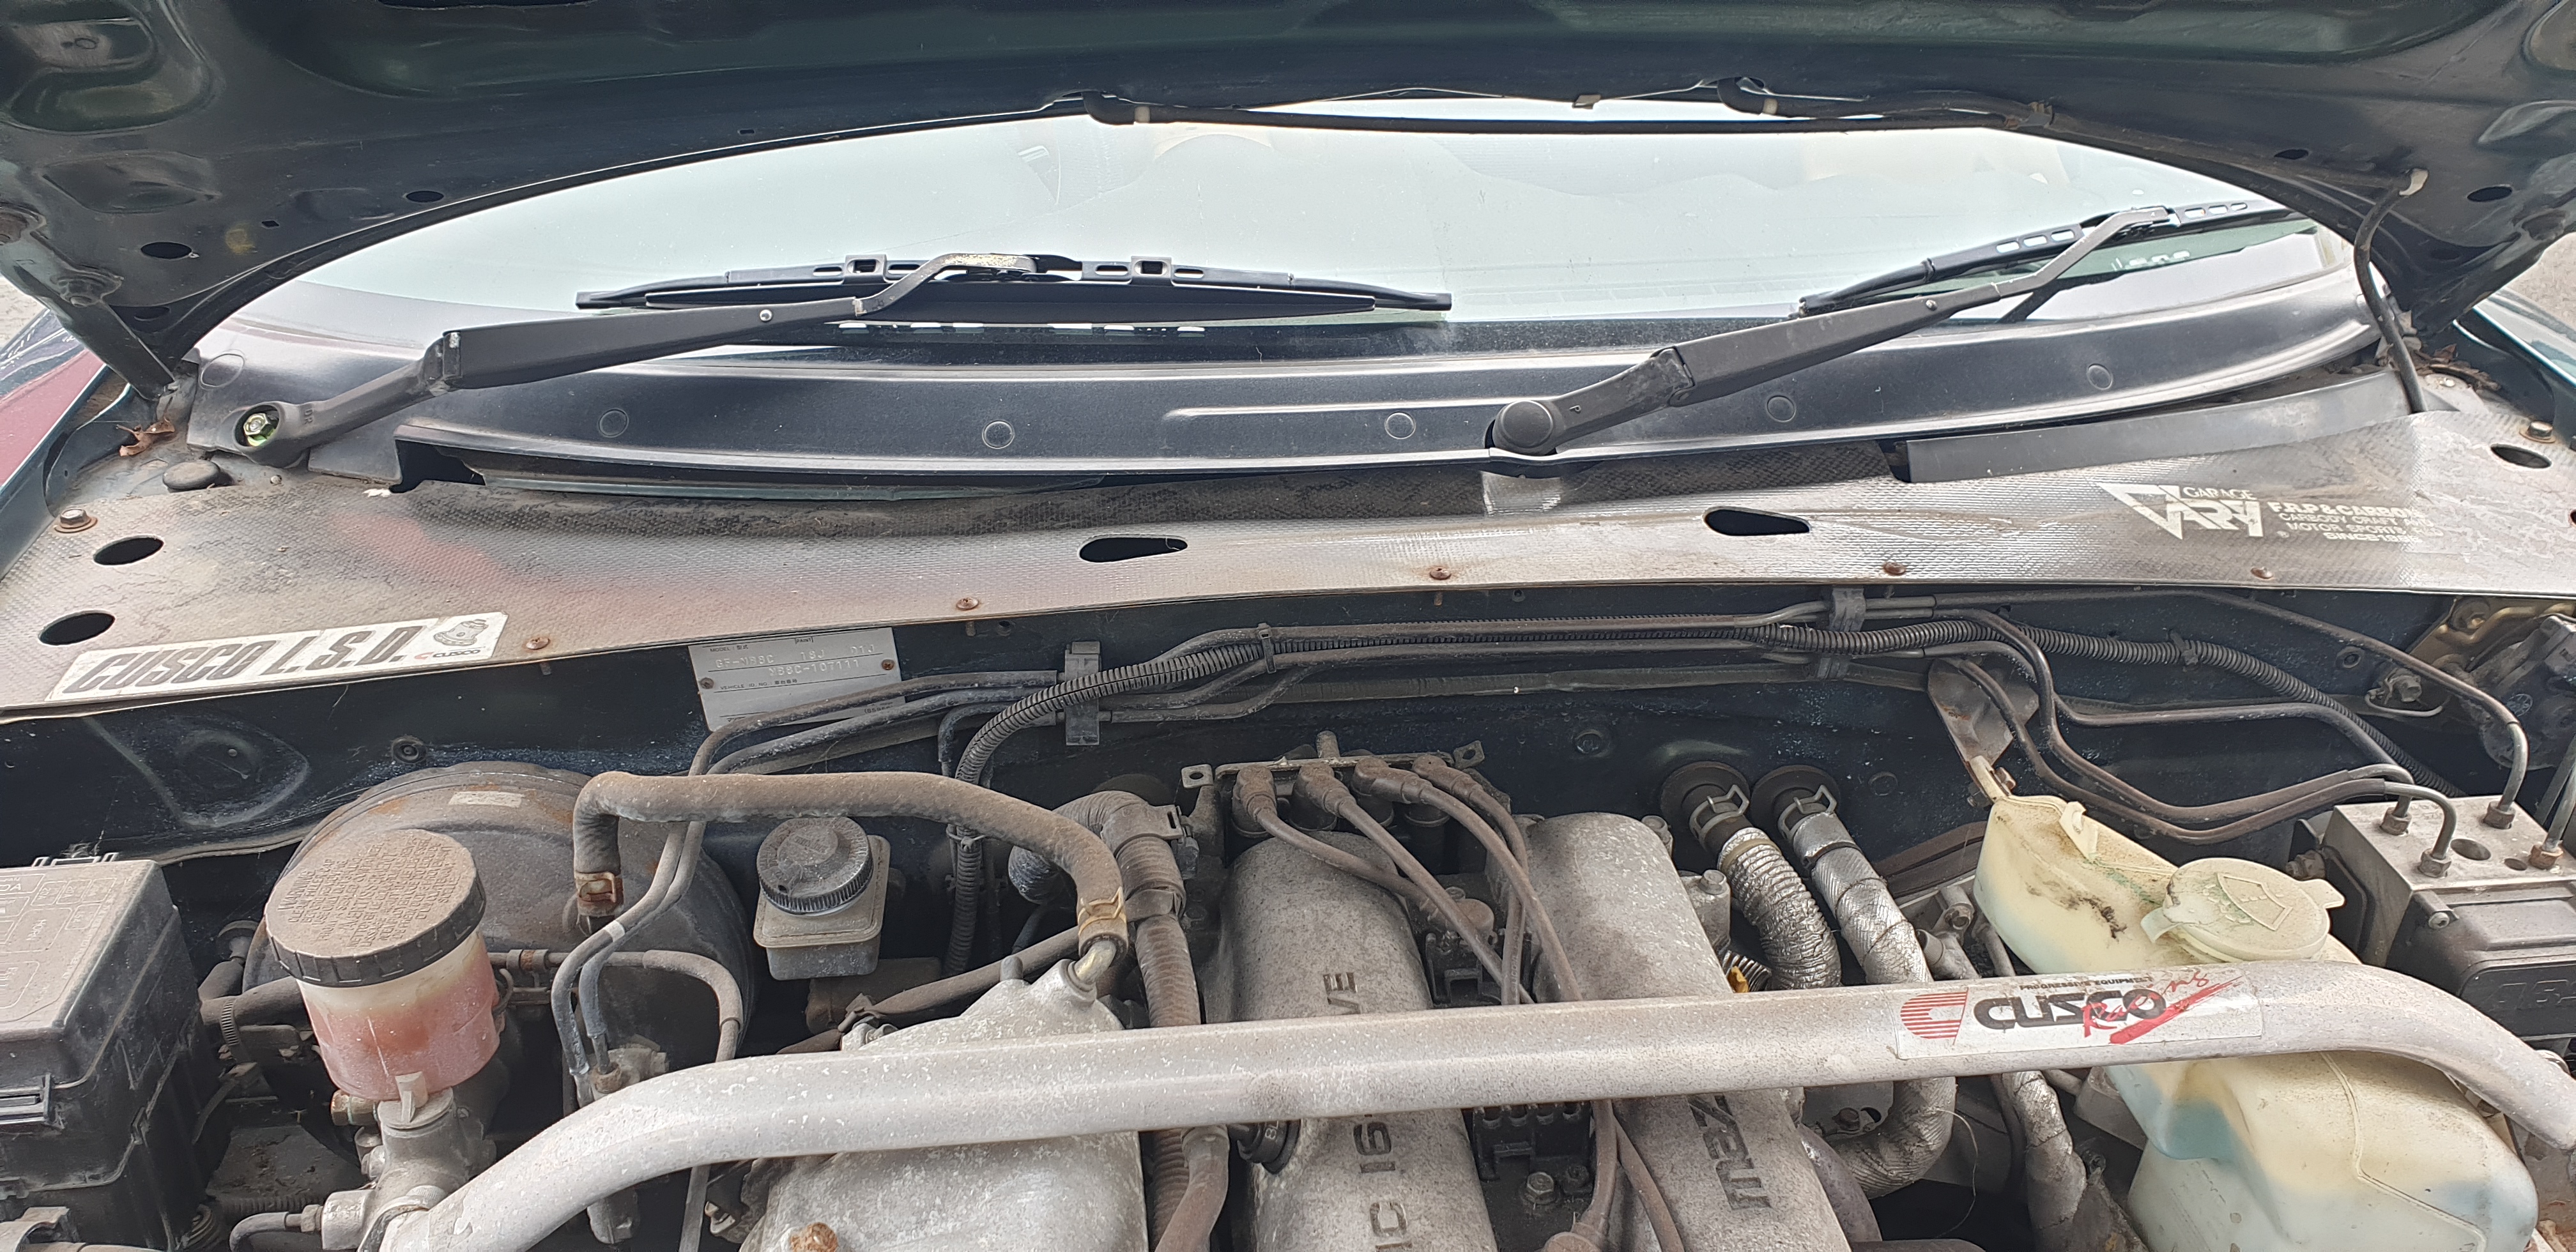
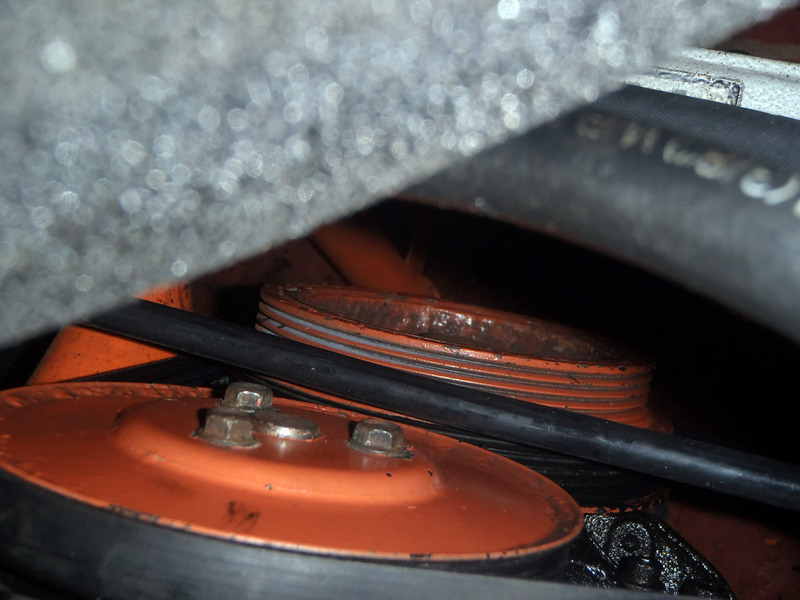
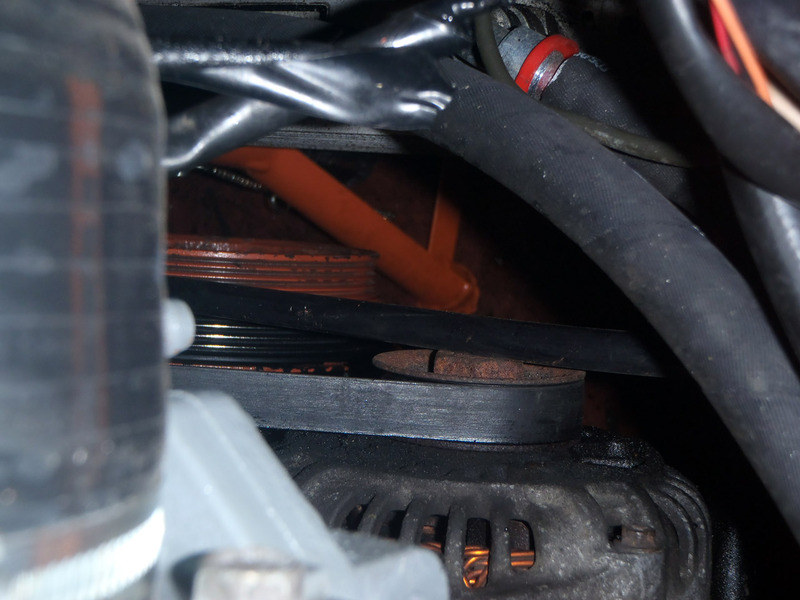
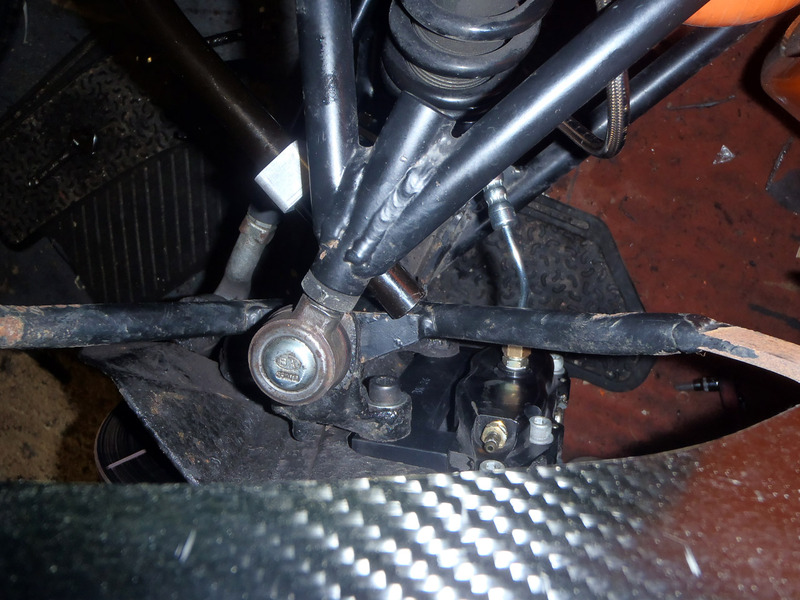
The real reason I bought the car though is given away by the sticker in that top left hand corner. Someone has spent the money on fitting a Cusco LSD which is super rare. It’s also super anti social when manoeuvring, so much so that until I had a play with it I thought it might be welded! It belongs on a track, not on the road so I’ll be removing it and fitting it to the Westfield. In it’s place I’ll fit the 3.6 LSD I have in the garage that was destined for the Westfield, but would be far more suited to a road car.

So there we have it, with the Westfield being built from a green MX-5, its now donating some of its parts to another green MX-5. The automotive circle of life perhaps.

No progress on the Westfield by the way. I’m vowing to do this “properly” and for that I need to clear the garage of stuff, which means building more storage outside of the garage, which means groundwork to lay a patio and I’ve suddenly run out of motivation. To be fair, like most of my winter projects I probably won’t start either car until Spring.

In the meantime, I’m loving driving around in this MX-5, even if it is a bit of a roundabout hooligan. Actually, probably because it is a roundabout hooligan.

Posted in Uncategorized | Leave a comment

My thoughts on owning a ‘big power’ Westfield

With a few years of a 340bhp Westfield under my belt, I’ve found myself more and more hinting others against such levels of power. I did have the word “advising” rather than hinting in there, but that’s not fair as I don’t think a big power Westfield is a bad thing. Quite the opposite, in fact. It’s just a very different thing to when it was a middling power Westfield. Given that I’m strongly considering a rather dramatic change of direction for my car, I thought it best to write down my thoughts on what it’s meant, even if just for my own benefit. I’ll approach a few of the more popular themes when someone mentions a rather silly bhp for a Westfield

“It’s a handful on the road”

Well, I suppose if it’s a track only car, which mine has been for a couple of years, that doesn’t really matter. However, when it had an MOT, it was a fantastic road car. I never had to change gear to find a higher speed, just ride the massively flat torque curve. It’s a ridiculously docile car which, aside from a slightly grabby clutch (more OEM feeling ones that handle the power are available), could probably be driven by just about anyone. It’s about the furthest from a handful that you can get.

What you can’t do, however, is work it on the road. It is far too quick for us mere mortals to be aware of hazards, correct the car over any bumps, change gear, process what’s going on around you, have to change gear again and even by the time you’ve read this, you’re significantly above any speed limits or indeed speeds where you’d survive and accident. To that end, it does stop being a Westfield, and become the world’s smallest GT car. Great and smoothing out the corners and cruising up to the next one with the gentlest of squeezes of the throttle. Thoroughly dangerous when deploying all of the horses.

This is not a bad thing. In some ways it’s positive because you tend to drive slower and smoother, and you already know that you genuinely are the fastest thing on the road and have nothing to prove.  The person with a 150bhp Westfield accelerating hard for 15 seconds between corners might be having more fun though.

“You can’t keep it cool”

More power, more heat. More revs, more heat. Can’t really escape that one. A Westfield also doesn’t have a lot of ways of getting rid of that heat. The bonnet opening is filled by a radiator originally specced to cool a 1.0 Polo. Now we’re trying to use the same area to cool a power output a comedy factor more than said Polo. This is where you spend your money.

The radtec radiator/intercooler combo was the single biggest investment in the turbo projects and it’s fulfilled its role beautifully. These are the coolant and intake temps recorded over a track session that must have had 26 minutes of full speed work.

Abingdon Long Run Coolant Temps and IAT

That was on one of those rare summer days with actual sun as well, so mid 20s plus the sunshine baking the tarmac. Those peaks are within 1.5 degrees of each other – to handle that for all that length of time is particularly impressive. Though of course, I deserve more praise for staying out there that long.

I’d say one of the benefits of having a large amount of power is also that you can afford to lose some. My engine runs a tiny bit rich precisely to provide a little bit of cooling assistance.

“Turbo engines are laggy, peaky and difficult to drive”

You tend to see these comments from the older generation, and that’s fair enough… they’ve driven 80’s turbos and, frankly, they’ve earned that opinion! None of it holds true nowadays though. The very modern turbo engines are impressively responsive. I think the only criticism you can throw at them nowadays is they don’t tend to rev that high anymore.

My car sits in the middle of those two extremes. It’s not laggy, it’s not peaky and it’s easy to drive. It also revs to 7.4k and makes power all the way there. But it’s not as responsive as something like an EcoBoost when lower in the rev range. Fine on track, but I do think it would be a bit frustrating on the road. Then I suppose, we’ve already decided that the throttle is to be used sparingly on the road. Also, is it any worse than an N/A engine with cams aimed for top end power?

Back to throttle response on track, it’s fine. You don’t wait for the power to come in. You don’t wait for the boost to build. It’s all there if you ask for it. Take the following graph of throttle position (blue), boost (red) and RPM (beige?):

RPM Boost and TPS

This shows the entry into a chicane, balancing the throttle through it and powering out of it. The throttle has been off for 4 seconds before this, suggesting I’ve caught a car up and it let me past on the exit. You can see the first input into the throttle produces an instant response from the turbo, and this is from 3.3k rpm so reasonably low for track work. This tracks the throttle position until the second application, where by the turbo responds again but is held back once it reaches the actuator level. Here, because the RPMs are in the mid range, the boost level is reduced to manage that massive lump of torque turbos like to give. Perhaps the reason they’re often described as peaky. The boost is now following a rising limit to keep the torque curve as flat as possible.

At the gear change, the throttle is off 100% for 0.5 seconds. The boost follows this, taking 0.6s to achieve 21psi again. Which yes, is higher than it was originally set but crucially, not higher than it has been mapped for. Either way, I think that’s plenty responsive enough.

So what do I think?

Big power doesn’t ruin a Westfield. I’m 100% confident in that. What it does do though, at least for mere mortals, is change it. I’ve found that corners on track are mere obstacles to be cleared ready for the next application of power. Get the car slowed down (no mean feat!), turn in, get it roughly near the apex, balance the throttle, wait for it to straighten out, then deploy the power down the straight ready for the next corner. It’s made me lazy in many respects. On a sequence of close together corners or chicanes, I won’t be taking stabs of throttle between them. Just a gentle squeeze to smoothly get me to the next one without arriving too quickly and giving myself too much to do. Quite the difference to when I had 150-160bhp on throttle bodies. I suppose in that respect it’s ironically safer on track as you don’t tend to go hunting for those extra tenths. You don’t need to. It’s probably quite telling that since fitting a turbo, I’ve never spun on track. I’ve gone straight on at corners more than once! But never spun it.

There is only ever one thing quicker than me on a track, and that’s a lighter, less powerful Westfield/Caterham. They’re usually on slicks, so a more serious effort than mine, but typically 100bhp or more down on me. And if they’re quick enough to catch me up despite the deficit on the straights, it shows how much I waste through the corners by not applying the throttle or pushing the car. Which isn’t speed I’m wasting, it’s fun and personal reward.

I’ve had a lot of fun with my Westfield, and I don’t regret any of the options and even at my most modest I think I’ve done a really good job of breaking the 300bhp barrier in the right way. Even if I never actually meant to. But I’ve had my fun now, and it’s time for a change. For a long time now I’ve wanted to build another, knowing what I’ve learned over the last 7 years. So I’m going to rebuild this one, with less power, and more revs, and less weight, and more noise.

Goodbye gentle beast. Hello bloody idiot.

20200517_160554

That’s an RX-8 231 engine. It’s going to rev to 10k+, it’s going to breathe fire, it’s going to drink fuel like a water wheel and confine me to the noisy step on track days… and every now and again… it might even work!

Posted in Uncategorized | Leave a comment

Front anti roll bar for Mazda SDV

Whilst discussing suspension upgrades with Blink, they suggested that the Playskool anti roll bars are good bits of kit and certainly recommended for track use. I’d just missed out on a Westfield ST-3 ARB sold on the forum, so I started searching and couldn’t find any information on the following points:


  • ARBs that fit the Mazda SDV that aren’t the ST-3
  • Playskool front ARB fitting the FW bonnet

Undeterred (too stupid to take a hint from those two points), I bounced a few ideas off Blink, Mark (Westfield forum) and Playskool and got one ordered. We went for the widetrack version as the Mazda shocks are mounted 50mm further out on the wishbone than standard items. Due to having the FW bonnet I would expect to reverse mount the bar like Mark did, leaving the cutouts in the tub.


After a small delay (pesky holidays), the following lovely bits of metal arrived:

OLYMPUS DIGITAL CAMERA


Sometime later, with a track day approaching I thought it was about time I got around to fitting it. I loosened off the wishbone bolts and popped the brackets on. It didn’t look like massive amounts of tub had to make way:

OLYMPUS DIGITAL CAMERAOLYMPUS DIGITAL CAMERA


Then, and I don’t know where this came from, I decided to mock the fitment of the bar before chopping the tub and fitting the bar. I threaded some hose between the holes to see what path it would take. It got mighty close to the water pump pulley!

OLYMPUS DIGITAL CAMERA


Before colliding with the alternator

OLYMPUS DIGITAL CAMERA


Doh! It’s at this stage I usually stare at it for half an hour wondering how on earth I could bodge, sorry, engineer my way around that one. I couldn’t really, short of moving the engine back but there wasn’t much room for manoeuvre there!


I resorted to fitting it normally and had a look to see what my options were. There wasn’t a lot so space in front of the wishbone bolts, certainly not enough for the mounting bracket, but it did look like it sat inside the bonnet and behind the light covers so most of the cutting would be to the section that isn’t visible. There was a risk that the bracket would poke through the cover, although if it were sprayed black it might not look too odd with the bonnet shut.

OLYMPUS DIGITAL CAMERA


I must have moved a coolant pipe when fitting the radtec as that was rubbing the bonnet. Something else that would be getting ‘refined’ then.

OLYMPUS DIGITAL CAMERA


I opened the bonnet fully and fitted the wishbone and brackets to see what else would have to be contended with. It seemed to line up ok, so at least the width was alright.

OLYMPUS DIGITAL CAMERA


The cycle wing brackets got close on full lock though:

OLYMPUS DIGITAL CAMERA


And touched on lock the other way:

OLYMPUS DIGITAL CAMERA


No big problems there though, it wasn’t quite centralised so a bigger gap on the other side for the first one and I could lop 20mm off the ends for the second one.


Pulling the bonnet onto the brackets suggested my optimism on what gets cut wasn’t entirely misguided

OLYMPUS DIGITAL CAMERAOLYMPUS DIGITAL CAMERA


I got out the dremel and proceeded to make an awful lot of orange dust. I think it ends up making remarkably little difference to the FW bonnet, at least visually


OLYMPUS DIGITAL CAMERA


It does push the light covers out slightly though:


OLYMPUS DIGITAL CAMERA


I intend to get around this by cutting the required hole, sculpting in some kind of bulge to cover it then skinning it in carbon fibre (or taking a mould and making it, depending on how brave I am). For now though, I was happy with a small gap. I chopped the 20mm off the ends of the bar and set it up so the linkages were straight as my starter-for-ten, then rechecked my clearances:

OLYMPUS DIGITAL CAMERA


Much better (shaded in red slightly).


Jacking up the uprights also showed that nothing would interfere so it was good to go. Which was handy, as this was a Wednesday and I had a track day Friday.


I didn’t do any setting up, just left it as it was and the effects were immediately obvious. There was much less body roll, which is both an obvious effect to notice and an obvious effect to foresee! I don’t think it’s made the car any quicker, but it’s definitely made me happier with the car and that’s the main thing. I’m sure once it’s been fully set up over winter there will be another night and day difference again.


So, the Playskool Widetrack ARB fits the Mazda SDV, and the Playskool ARB also fits the FW bonnet if you’re happy to modify the light covers or happy to have a small gap. Or I suppose a corner of the bracket poking through.

Posted in Uncategorized | 2 Comments

Wilwood Powerlite Upgrade

Pretty much a year late to the day this one – sorry. There’s a couple of upgrades I need to document but we’ll go in chronological order and start with the brakes.

With the increase in power, and the Mintex 1144s being half worn, I started to overwork the brakes on a track day again. They were still slowing me down well enough, but not consistently and towards the end of the day they were starting to noticeably fade. The same day, I’d also driven a friend’s Westfield and his brakes were far nicer to use than mine. I disliked the strange feeling mine gave of not being able to push them any further. Thus, the logical step was to move towards his setup. After chatting with Stewart at FreakyParts at AutoSport earlier that year, I finished off the discussion via email and put a kit together with Wilwood Powerlite calipers (essentially modifying an MX5 kit he does). These are designed for cars weighing 750kg or less and were the same calipers as in the Westfield that I drove and liked.

This is what arrived as the kit:

P7060003_s.jpg

  • Pair of 270mm Mtech brake discs. These were supposed to have a black rust proof coating but for whatever reason this didn’t happen
  • Pair of Wilwood Powerlite calipers
  • Set of Wilwood BP10 brake pads
  • Set of Wilwood PolyMatrix A brake pads
  • Brackets and fixings to suit

The BP10 pads were supposed to be sufficient but the Westfield I drove had PolyA pads. My friend suggested he cooked the BP10 pads hence going PolyA. Thus, the natural conclusion was to buy both pads and if the BP10s were good enough, I could sell the PolA pads on to him!

I set about stripping down the old, dirty setup that had been so effective until I’d ruined it with power…

P7060004_s.jpg

Once the old discs were off, I could compare them against the new 270mm discs. I’d have been happy staying with the standard size, but that would have meant a custom bracket which would have pushed the price up.

P7060010_s.jpg

Fitting was a doddle – simply bolt the new caliper carrier on…

P7060011_s.jpg

Pop the disc on and slide the caliper over the top (I’d left the old caliper attached in case it didn’t fit and I had to return it all back to standard)

P7060012_s.jpg

The backing plate needed bending a touch to accommodate the bigger discs but nothing major or complicated. I test fitted the smallest wheels I had, the 14″ track wheels and was surprised to see that there were no issues there.

P7060013_s.jpg

P7060014_s.jpg

Back to the technicalities. The pad size is marginally smaller (ignoring the chamfered edges of the OEM pads):

P7060018_s.jpg

The total piston area is also slightly smaller, so in effect I should get a bit more pedal travel and thus some more ‘adjustability’.

With it clear that the brakes fit, it was time to press on so I went to the local Pirtek and ordered some new brake hoses. The fittings were different to the Mazda calipers so the originals couldn’t be reused.

P7180001_s.jpg

In terms of hose length, they’re not much different but the fitting on the end is what gives them the extra length that was required. This was more because of where they attach to the caliper than the caliper being on a slightly bigger disc.

Full lock one way proved there was plenty of space.

P7180002_s.jpg

Full lock the other presented a problem!

P7180003_s.jpg

It took a bit of thinking, trial and error to get the ends bent into the right position but it was managed in the end.

With everything done, fluid changed it was time to pop the pads in…

P8030005_s.jpg

… and bed them in. I went to the same quiet road that I ran the engine in on and did the prescribed number of stops. They were quite grabby initially, made worse that for some reason the Nankang NS2-Rs that I was running made no sound when locking up. It didn’t take many stops for them to bed in though and on the short drive back I could tell I was already happier with them,

The next track day was soon after and 1.5 hot laps into the first session… they started to fade dramatically. My friend engaged smug mode that his prediction on the BP10s held true and we duly swapped them over to the PolyA. Apart from them being really quite hot, it was a remarkably easy swap!

I drove up and down the entrance road to bed them in and these were considerably more grabby than the BP10s. I felt they’d lock up if I so much as looked at the brake pedal the wrong way! It settled down a bit and after a couple of laps in the next session they were as good as gold.

Which just leaves the idiot behind the wheel as being the problem with the brakes! I’ll lock up far too often. This may be me getting used to the new brakes, or the extra torque from the bigger discs might be too much. I suspect it’s me of course so will leave it a few more track days before deciding if I need to do anything further.

Posted in Uncategorized | Leave a comment

Forged engine build – mapping

So with running in done it was time to prepare the car for being mapped. I drained the old oil out and set about replacing bits and bobs… somehow not dropping them into the oil. First off was the injectors. I wasn’t a long way off the limit of the RX8 injectors I was using and wanted a bit of flexibility. I ordered a set of 700cc Deatschwerks injectors for £260. I think the Deatschwerks injectors are remanufactured Bosch units.

OLYMPUS DIGITAL CAMERA

Deatschwerks 700cc injectors

Photographing them in situ is easier said than done!

OLYMPUS DIGITAL CAMERA

Another job I had was to replace the battery. It has been using a Varley Red Top 25 ever since the Mazda one tried to fall out on a track day a few years back. Unfortunately it’s gotten a little old now and wasn’t cranking particularly well, as mentioned in an earlier post. I was unable to find the Powervamp PVR20 battery but did find what must be its replacement, a Powervamp Clubsport EP. This is the same size as the Red Top 25 but with 16ah capacity instead of 20ah. It had 600CCA though which is plenty.


Slots into the same bracket nicely and cranks the engine at a much more suitable speed! I updated the ECU with the new injectors settings and it fired quickly… then cut out. With all the messing around trying to get it to start on the old battery I think I’ve taken too much fuel out so added some more by telling the ECU the injectors were slightly smaller than they actually were.

Oh, and this happened whilst I was running it in:

OLYMPUS DIGITAL CAMERA

Westfield steering wheel failure

Thankfully a cable tie got me home and a friend has leant me a nice OMP wheel for now.

Mapping day came along so in the morning I took the trip down to Skuzzle Motorsport… stopping once to check I wasn’t leaking any fluids. And again because I only had 3l of fuel left. That’ll teach me for patching a cold start issue with more fuel globally! I wasn’t very convinced I was going to make it to that petrol station!

Anyway, here are the results of the mapping. All figures at the wheels unless otherwise stated.

20psi dyno_s

This was the results of ‘seeing what it could do’. It’s at 20psi and you can see we’ve encountered the same problem as the TD04 just at higher power. There’s really little extra power to be had from 5.5k. The turbo is just becoming inefficient at those kind of flows. With the big figures though, we had plenty of scope to tune the shape and make it more drivable. We went for a rising boost rate to reduce that big slap of torque from 4k onwards.

17psi dyno_s

This is where we left it, with boost rising from 11psi to 17psi. In terms of headline figures we’ve sacrificed a few bhp and a fair amount of torque but there’s still way more than enough for a Westfield! Here’s the two charts overlaid:

20psi vs rising boost_s

So the green is at a steady 20psi and the red is the rising rate. It shows better just what a difference that’s been made. It should be something in the region of 335bhp using a conversion factor of 1.2, which even with 620kg is 545bhp/ton. That’s more than enough!

Posted in Uncategorized | Leave a comment