Brake pads glazed

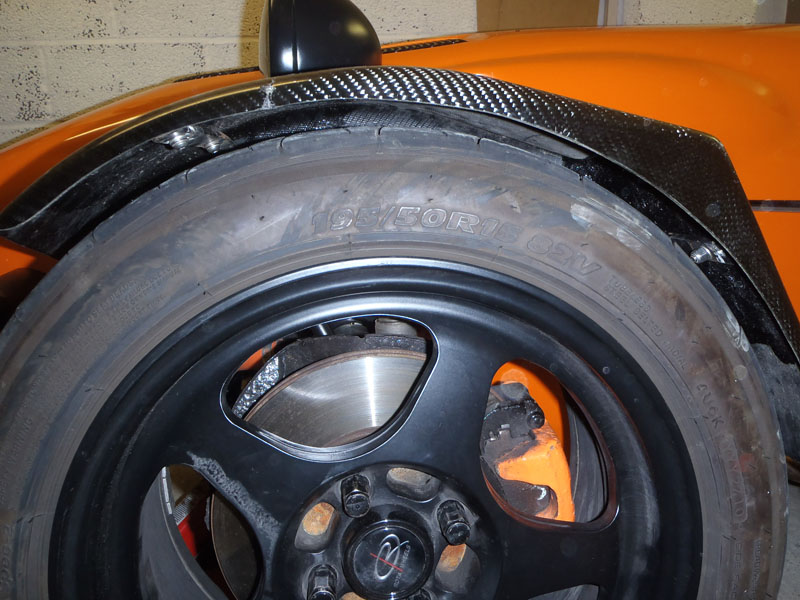
Another victim of the Abingdon track day (that wouldn’t become apparent until the next time I drove it) were the brake pads. The heat put into them (they were smoking at the end of each session) wasn’t handled particularly well and the pads glazed. It’s a shame really, in terms of stopping power they were quite good and certainly didn’t seem to fade. It must have been as they cooled down.

I removed the front pads and sure enough, there was quite the reflection in them.

Pads glazed Pads glazed

I’ve sanded them down and they’re beginning to approach normality again, but they will definitely be replaced before the next track day in July. They’re starting to show signs of wear (in terms of thickness, not the obvious) so they’ll only ever be less able to deal with the heat.

They’re the cheap OEM style EBC pads, so it would unfair to criticise them for not standing up to track abuse. From what I can gather, genuine pads are up to the job but another pad recommended is the Mintex 1144. I may well give this a go next.

There is another option, and that is the Flyin Miata Little Big Brake Kit. Essentially, uses the standard size discs but with Wilwood four pot callipers. Doesn’t come in particularly cheap mind. Rally Design also do a version. I’ve got a quote for the Flyin Miata kit so I’ll sit on it a week or so and see if I still think it’s a good idea. Surely overkill in terms of brakes, but those callipers are about 1kg each lighter, and of course, look good.


Posted in Problems, Track days | Leave a comment

Battery mount failure

I had a problem on the last track day I did (Abingdon April 2014). I learned to brake harder and later. Mid afternoon, and with a passenger for maximum effect, the car cut out after a corner. After coasting to a stop in a safe place, it restarted, so I nursed it back to the pits. The rear mount for the battery had ripped itself out of the panel it was riveted to, and part of the mount itself touched the positive terminal and caused a short. Luckily it was only temporary and dislodged itself.

After identifying the problem, I refitted the rear mount but poking it through the panel and using a nut and washer. This meant it was now too short, and so the gap was tied together with trusty cable ties.

This worked well, until 8 minutes or so into the next session, when the problem re-occurred. This time though, it is the front mount that has ripped out and sent the mounting hardware diagonally across the battery, again greeting the positive terminal like an old friend. And so begins some impromptu arc welding under the FW bonnet, with associated sparks.

I’m pretty sure I’ve never unlocked and opened the FW bonnet so quick! I use a set of keys to remove the shorting mounting because they’re insulated. However, once that is done, I decide it’s safe to use my hand to make sure it doesn’t reattach itself. Naturally, it’s still bloody hot! The marshals arrive at this point and disconnect the battery for me, and even push me back to the pits!

Near doom

You can just about see in the photo where the front mounts have ripped out (of the chassis tube, not the aluminium panel in this instance) and where it’s nearly burned a hole in the side of the battery. This could have been a lot worse!

In hindsight, I should have seen it coming. That’s quite a tall heavy battery, so the moment created at the top under heavy braking must be pretty large. Certainly large enough to rip rivets out. I’ve since replaced the battery with a smaller, lighter Varley Red Top 25, kindly donated by Stuart (another Swindon Westfield owner). This has been mounted horizontally using a powervamp bracket.

Certainly got lucky there, being a track day if the car had caught fire I’m not sure if it would have been covered on insurance or not.

Posted in Problems, Track days | Leave a comment

GoPro Hero 3

In September 2013, I ordered a GoPro Hero 3 Silver from http://www.tartybikes.co.uk (affiliated with a member on WSCC). I opted for a roll bar mount to go with it.

GoPro Hero 3

It came with a reasonable amount of accessories. There are two enclosures, one fully sealed and one with an open back. It says to use the fully sealed ones when likely to go above 100mph. To be honest, I find the sound quite muffled from the two trackdays I’ve used it on. I think I’ll try the one iwht the open back next, assuming it is dry of course. If that captures too much wind noise, I’ll get an external microphone.

Posted in Cosmetic upgrades, Track days | Leave a comment

Aerodynamix Rear Diffuser

Only a year late with this one, sorry folks. Been too busy driving it or modifying it!

I had always wanted a rear diffuser, more to tidy up the rear end than for downforce though. As it stands, the rear of the tub is open at the bottom, but closed on all other sides. With air coming in from underneath and possibly down through the transmission tunnel, it commonly gets referred to as a parachute.

The Aerodynamix diffuser is great as it mounts behind the rear seats and extends to be flush with the rear tub.

http://www.aerodynamix.co.uk/rear-diffuser-wide-body.html

Diffuser 1

You can see it has dropped steps formed in to allow for wishbone travel. With some diffusers, you need to cut these out instead.

Diffuser 2

Mine was one of the early ones so the top side is essentially ‘unfinished’. The current ones are black on both sides. Julian from Aerodynamix has offered to finish this for me, but I’m obviously too lazy to get it done!

Another great feature of the diffusers is it is essentially ‘quick release’. To fit it, you attach this aluminium channel to the chassis tube at the base of the seat floors.

Diffuser fitting channel

The front edge of the diffuser then slots into the channel, pictured below.

Diffuser channel

Diffuser channel

Of course, it’s not all that simple. When fitting the channel, you do need to do it in sections to you can fit it around the brake and fuel lines.

Trimming points Trimming points

Once trimmed into three sections, I fitted rivnuts into the chassis. By drilling a hole through both edges of the channel, then drilling a much larger hole through the bottom edge (facing the floor), I was able to insert a bolt and a socket to attach the rails. The diffuser the slots into the gap, gripping nicely on the bolt heads.

Fitting the rear of the diffuser is also via a pretty neat method. Essentially, you get this (assuming you order the fitting kit)

Fitting kit

Link below which has more photos – I obviously got carried away and forgot to take any more!

http://www.aerodynamix.co.uk/rear-diffuser-fitting-kit.html

Essentially you get your common bonnet pins, and some stays that go into the fixings for the spare wheel carrier. Once these are clamped in, you’ve then got a vertical hole for you to attach the rods of the bonnet pins. Mark it all up, do some drilling and once all assembled you’ve got a very quick way of fitting and removing the diffuser. Slot it into the front channel, raise the rear and side the pins in. Simple!

I’ve noticed no difference on road or track, and to be fair I wouldn’t. Speedo didn’t work when I didn’t have the diffuser and I’m not experienced enough to be able to tell the difference if it did change the nature of the car. However, I have had to work in the diff area since and it does stay nice and clean, so it must do something with regards to smoothing out the airflow.


Posted in Cosmetic upgrades, Performance upgrades | Leave a comment

Carbon CSR Style Wings

So after the ‘Westfield interface’ incident at Hullavington I sourced a second hand pair of carbon CSR style wings, literally 5 minutes from my house. I must admit I’m not usually a fan of CSR style wings, they have to be mounted just right to work. However, they were cheap and couldn’t be any worse than the gaffa taped effort at the moment, so why not…

These wings already had big head bolt/nuts fibreglassed in. Turns out I should have done the same rather than bolts in all four corners. Doh! Schoolboy error that. Anyway, this meant that the holes in my wing stays had to match, so plenty of bending and redrilling was required. Eventually, I got the first fit of the passenger side done.

First fitment First fitmentAt this stage, it was sitting too high, too far backwards and too far towards the engine. Another couple of hours fettling the wing stays ensued and I got to this:

Second fit Second fitBetter. Not great, but better. It can’t go much closer at the back else the fixings will rub the tyre. I think I can bring the front closer slightly, and outwards a touch more. I’ll take a look at that once I’ve fitted the other side.

I’ve also had to lose my side repeaters in the process. Undecided on what to do about that.

Posted in Cosmetic upgrades | Leave a comment