Turbo clocked

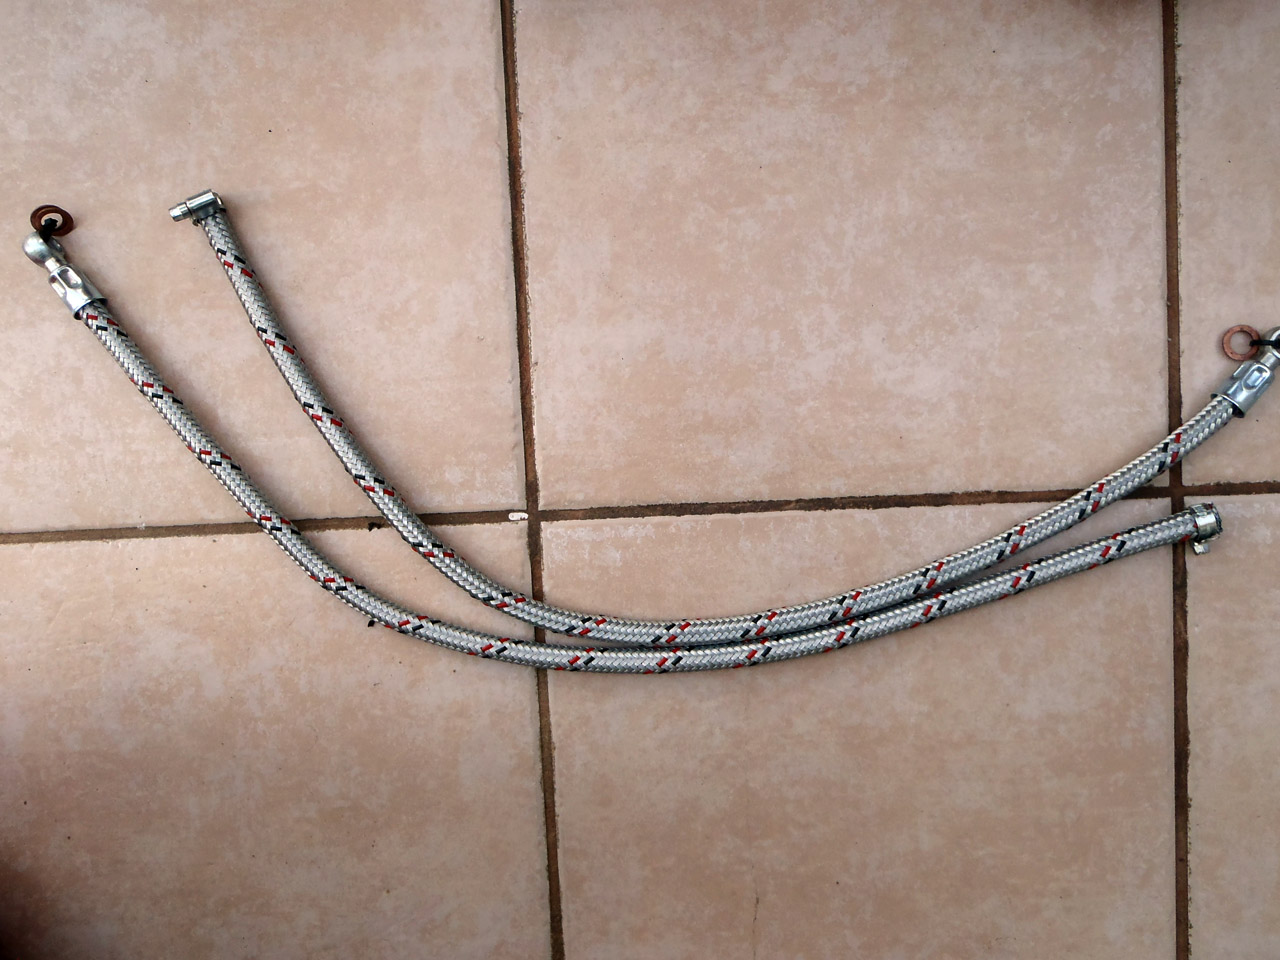
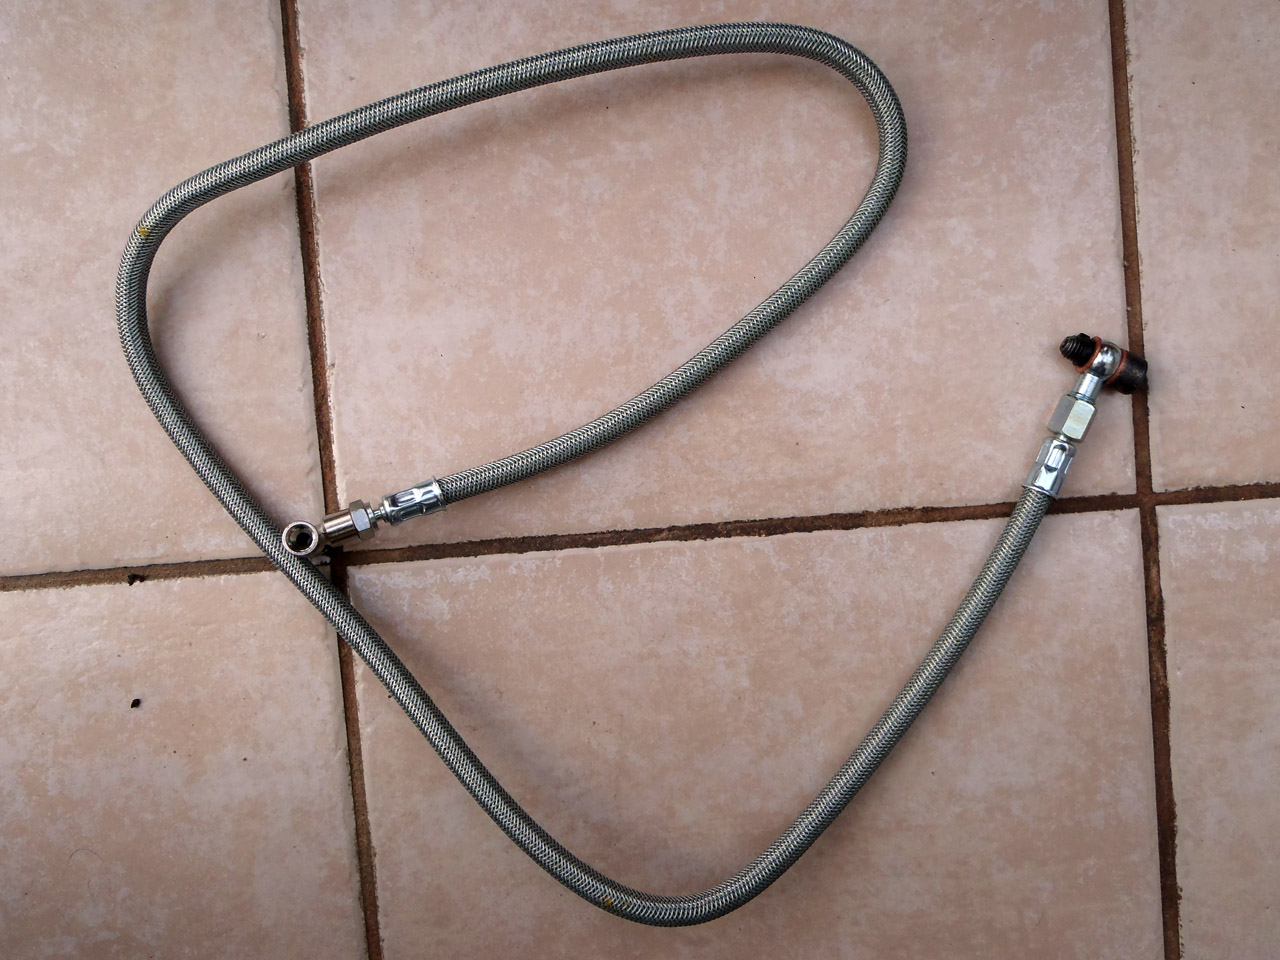
Ok, I’ve now ordered the hoses to move the coolant pipe. I’ve also ordered the hoses to connect the air filter and, gulp, the radtec radiator/intercooler. That’s got a lead time of 2-3 weeks but plenty to be getting on with.

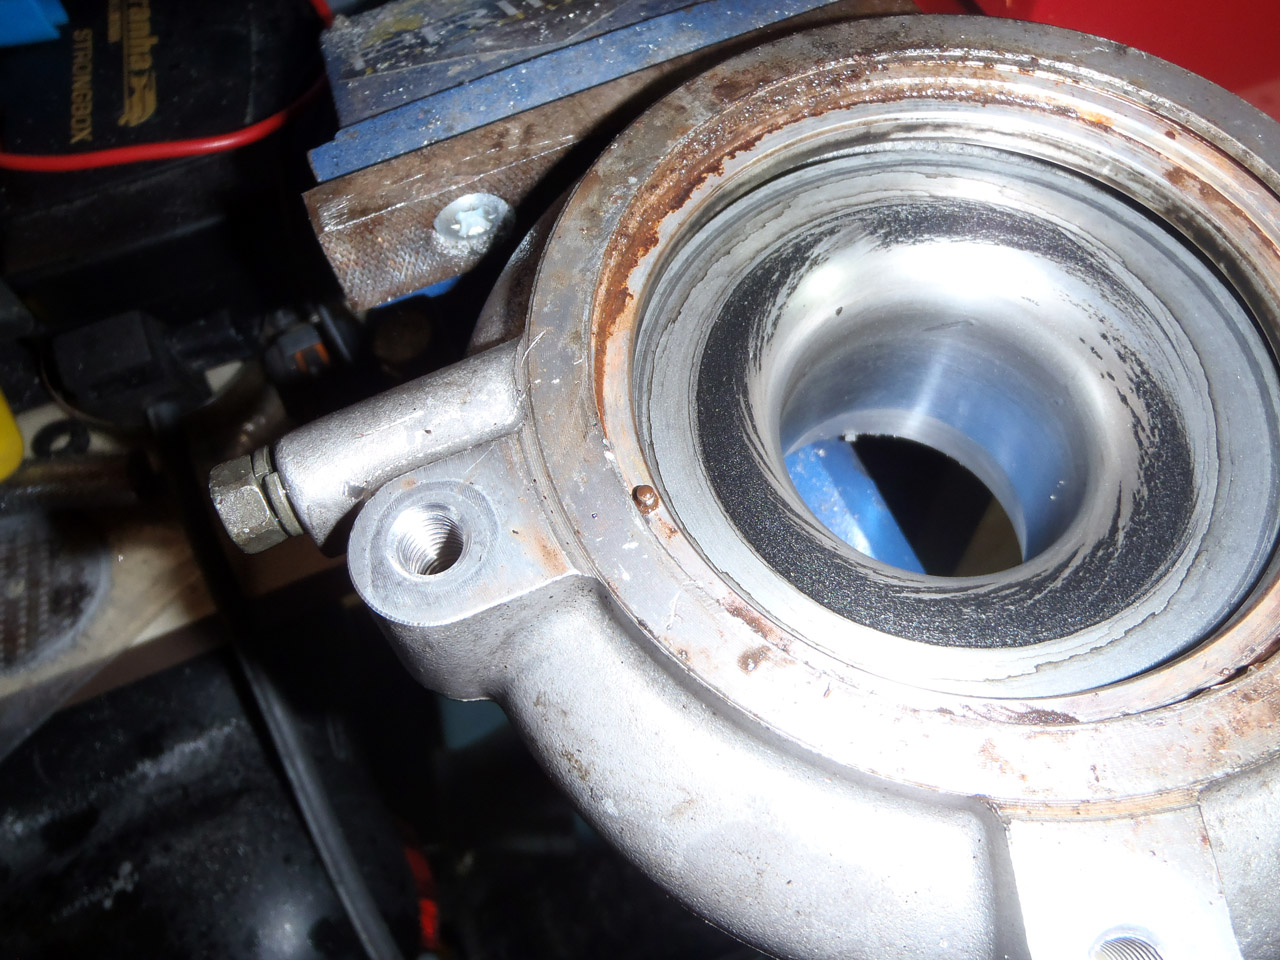
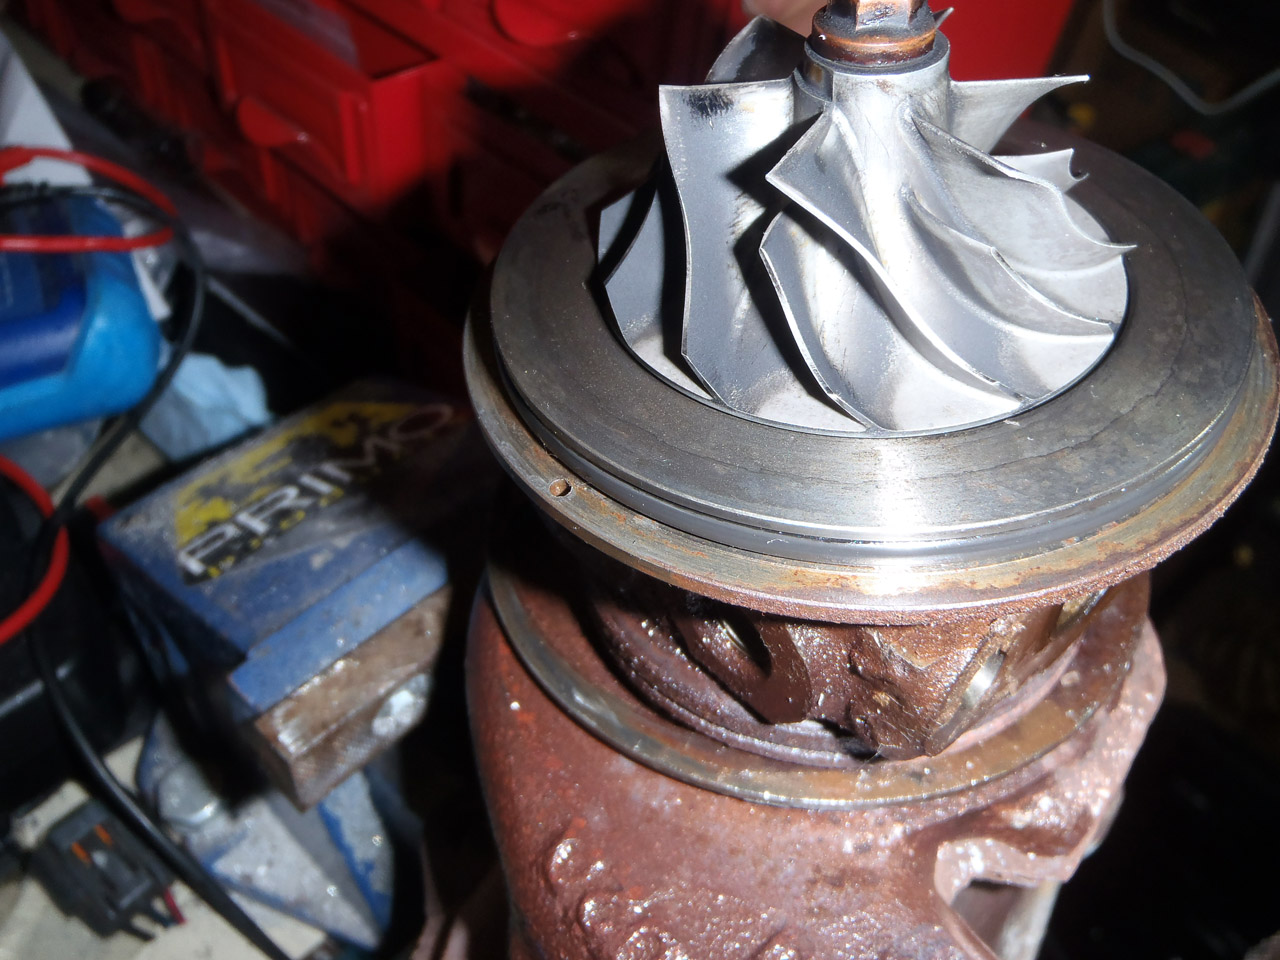
This weekend I gave myself the task of rotating the compressor/intake housing so that it would point down in my installation. To do that, it needs removing and it’s at this point I’ll introduce you to this circlip:

This thing made me swear. A lot. I hate circlips at the best of times but this one has risen from a special place in hell and found its way onto my turbo. I started off calmly, popping into the local machinemart and getting what I thought was an appropriately sized pair of circlip pliers. No joy initially – it was seized in there and didn’t want to loosen. I resorted to a bit of penetrating fluid, and still no joy. So I resorted to a bit more, and a bit more.

I left that soaking for a while, and when I came back to it, one side would compress with the pliers but the other side wouldn’t. Then the other side did, and I ended up wearing most of that fluid. Safety goggles were dug out and worn after that!

Unbeknownst to me, the pliers I had weren’t appropriate for circlips that strong, and when I got a bit of compression on the clip it slid off, sending more fluid my way and getting stuck back in the ridge again for good measure. Eventually, after some seriously strong words, I removed the circlip devil from my turbo.

The compressor housing is located with a peg and a hole.

Peg:

Hole:

All I had to do was drill a new hole 90 degrees clockwise from the existing one which would turn the housing through 90 degrees. I popped the drill on charge and cleaned up the housing whilst I was waiting. With the hole drilled, I popped the housing back on and checked it against the manifold. Good news, it was spot on… which meant another battle with this little chap.

Tourettes ensued – I’d compress it so far and it would slip off the pliers whilst trying to manoeuvre it in. What I needed was some kind of locking mechanism on the pliers, so I could pay attention to making it fit rather than focusing on just trying to compress the stupid thing. Today I picked up a set of pliers from machinemart that use a screwdriver type mechanism to open and close. Then I got it refitted within 3-4 goes. So much easier when you have the right tools!

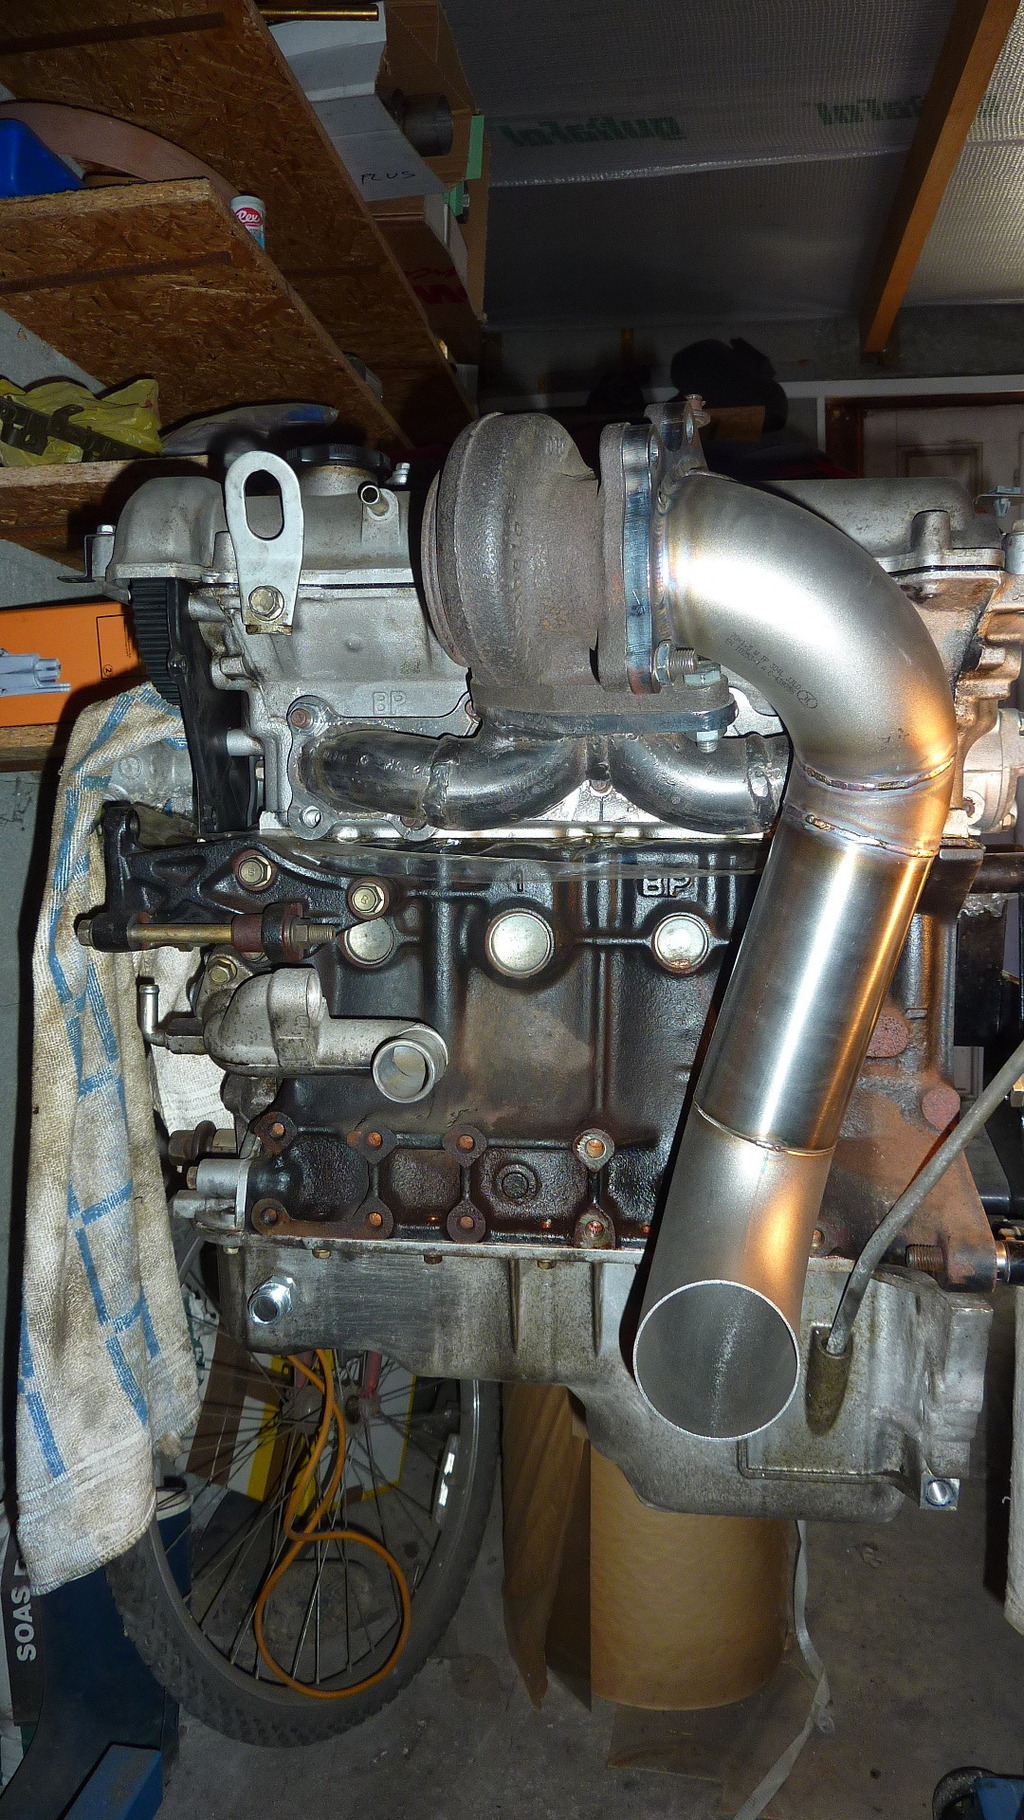
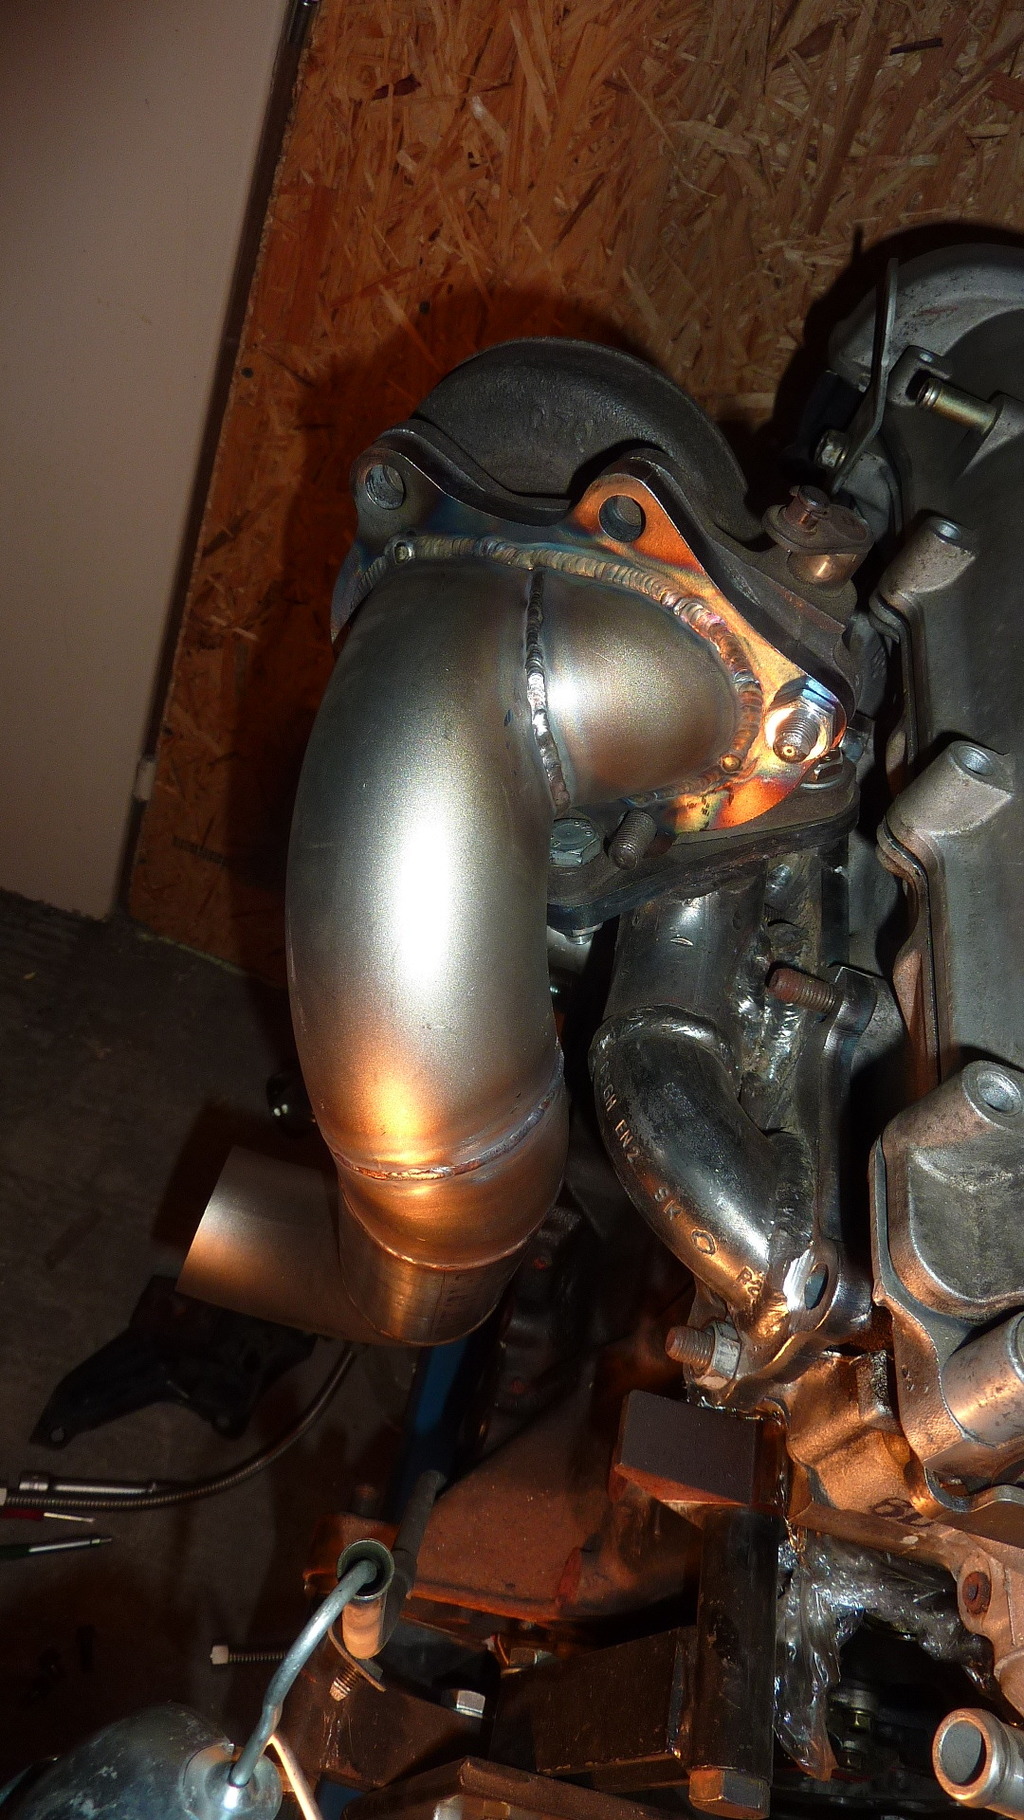
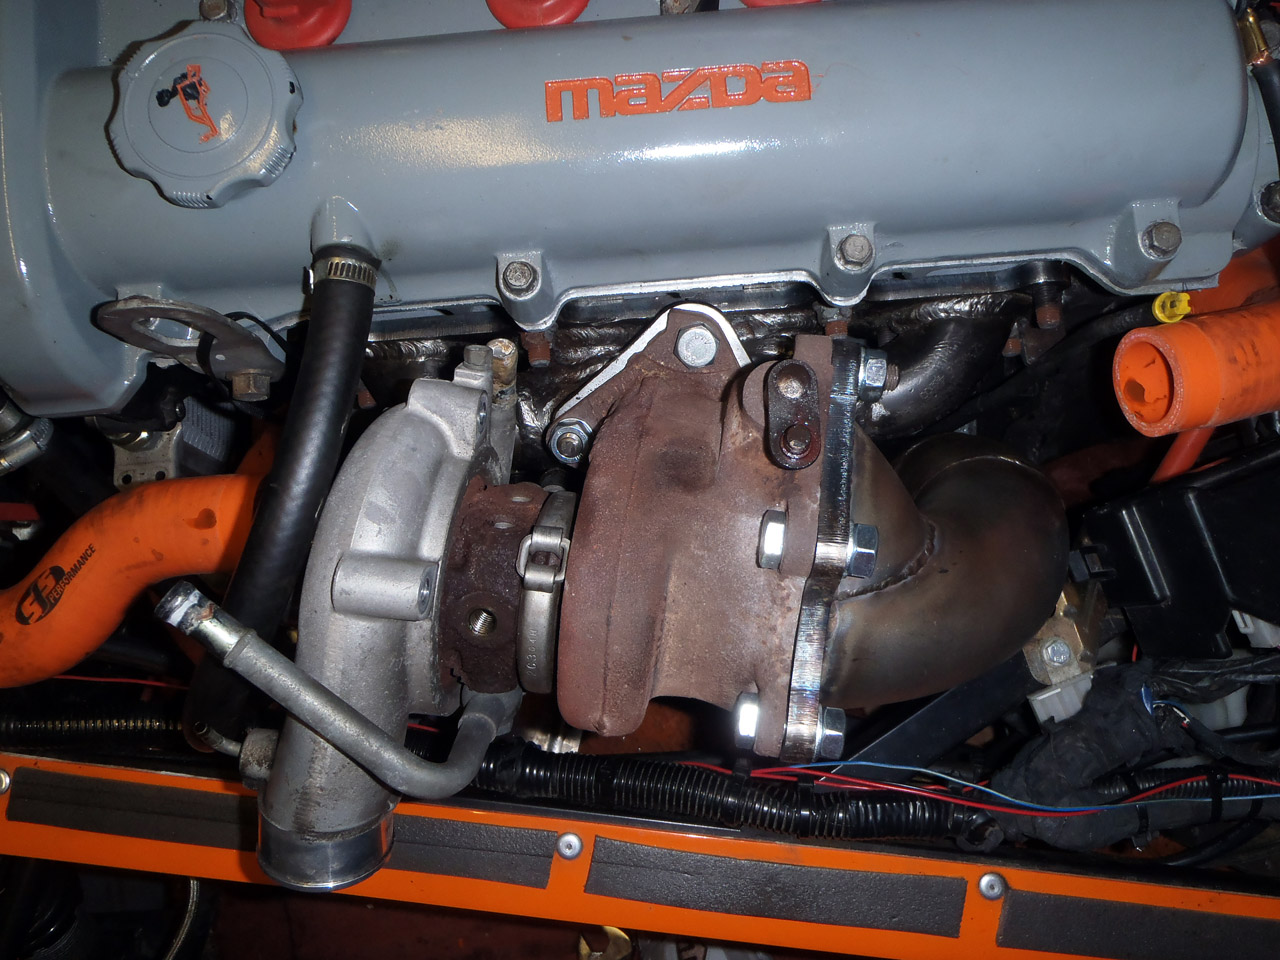
And here’s the turbo back in its new home:

The outlet now points into a nice big gap… and I don’t even have to move my catch tank.

So that’s probably it for now until some of my silicone hoses start arriving later this week. Aiming to have it all done and dusted by the 2nd week of July. Not too far away, but if I can do the coolant lines this weekend, oil lines next week, then get the exhaust made up the week after, then the intake piping the week after that… then get it mapped. Sounds doable… at the moment.

Posted in Performance upgrades | Tagged , , | Leave a comment

Turbo project – the start

Even during the throttle bodies build I’ve had a side project going with a well known fabricator of turbo manifolds/downpipes for MX5s, and it’s now starting to come to fruition.

Now, I’m not the first person to turbocharge a Mazda SDV Westfield. There’s at least two others, one in the states using a Mazdaspeed manifold, and one in the continent using (I think) an aftermarket interpretation of the Mazdaspeed manifold. The problem with the Mazdaspeed manifold is it sits the turbo down low, requiring modifications to the passenger side engine mount. Whilst this is out of my skillset, finding someone to do it would be pretty easy. Unfortunately, the manifolds themselves proved impossible to track down.

So I turned to someone on the MX5 forums who was well known for making custom turbo manifolds. I asked him if he could help me out and we started looking into the options. I gave him measurements of the engine bay and he suggested a top mount turbo would probably fit best. I then chose the turbo so that he could start mocking stuff up. I wanted a turbo that would spool quickly whilst also being readily available and cheap. This meant it was either a T25 from a 180sx or a TD04 from a Subaru. I went for the TD04 as it’s slightly bigger than the T25 but should still be making positive pressure from 2-2.5k. As long as I’m sensible, it shouldn’t run out of puff at higher revs.

Within an impressively short amount of time he’d made a mockup on a spare engine he had…


The downpipe curves back on itself to clear the triangulation at the rear of the engine bay.

With the guy being 1,200 miles away, a test fit was impractical so I adopted 21st century bodgery and photoshopped it.

Looked close, but also looked like it would fit.

We put a kit together…

And I went ahead and sourced a turbo. A TD04L-13T from an Impreza.

TD04L-13T

TD04L-13T

Fast forward to today and a parcel arrives… it contains…

Exhaust manifold

Exhaust manifold

Downpipe

Downpipe

Actuator

Actuator

Coolant lines - these essentially replace the thermostat bypass hose

Coolant lines – these essentially replace the thermostat bypass hose

Old drain

Old drain

Oil feed - this tees off from the pressure sender

Oil feed – this tees off from the pressure sender

Extra downpipe bits for mocking up the piping needed to link to the silencer

Extra downpipe bits for mocking up the piping needed to link to the silencer

This meant I could get started this weekend and see if it would actually fit! The first thing I did was bolt the turbo to the manifold and see if the oil drain would be in the right place:

Thankfully, it was. Of course, it was always going to be given it’s the same orientation as when it was in a Subaru, but I hadn’t considered that

I then double checked it all bolted together ok.

Looks like I’ll need to rotate the inlet housing, not a difficult job.

Downpipe also bolts on nicely:

Lastly for today, enthusiasm got the better of me once again and I went straight for a test fit. Here’s where it all needs to live:

So two things in the way at the moment. The coolant pipe and the oil breather pipe. Neither are exactly rocket surgery to reroute. I drained the coolant and removed the offending pipe, followed by the exhaust.

Then bolted the manifold on. Some of the nuts are now a lot harder to get to and torqueing them up will be fun, but that’s some pain I can save until later.

The turbo was next:

I was surprised that even with the inlet housing at the wrong angle it still fits with room to spare. Obviously I could never get a hose onto that, but it did look like the bonnet would close at least.

The downpipe dropped in relatively easily:

I’ll just have to move that relay box but it’s otherwise better for space than I thought it would be!

The downpipe also currently stops in a pretty good place! Not bad when the fabricator only has a set of measurements to rely on… and I’d taken those measurements.

In fact, the only bit of modification required is I need to file down the actuator mounting bracket slightly:

As expected, the actuator means the oil breather pipe needs rerouting.

In all, there’s plenty of space, more than I thought they would be so I’m quite chuffed about that:

Will hopefully get it all together by July. Not sure yet if I’ll take it off, refit the old manifold and actually use the car whilst I’m sourcing the bits.

Cooling-wise, I think I’ll opt for a RadTec radiator/intercooler combo. Expensive, but a pretty neat solution. Hopefully even with the intercooler in front of it the radiator should have the capacity to deal with all this heat.

Posted in Performance upgrades | Tagged , , , | 2 Comments

Hullavington Track Day

So the first real test of the winter upgrades. I took my brave pills and didn’t hire a trailer for this one, betting on the fact that as it has survived being mapped it probably wasn’t going to blow up.

When I arrived I went straight to the sound testing area whilst the engine was still warm. I hate arriving on a trailer then having to unload it and rev it to 4.5k with the engine stone cold! It registered at 98db, up from 95db last year. Limit was 100db so there’s still some scope before I hit that.

During the day the car behaved well. It’s noticeably quicker than before (though as a driver I don’t think I was as quick, bit rusty). Because I was running the cam tensioner spring as a return spring the throttle was quite stiff, so heel/toe became impossible but otherwise the car drove well and the throttle sticking wasn’t really an issue.

Where Mike (1.6 Mazda Westfield) was pretty much just as quick as me down the straights last year, the difference was night and day this time. It’s been a long project (albeit compressed into 2-3 months) but the end result has been worth it for that alone…

When I got home, I had a look at the videos I captured and compared them with last September. I made one comparing the sound of the standard intake and the GSXR throttle bodies. It also gives a sense of the speed difference too.

And here’s a video showing just the highlights of when I met others from our group on the track.

So overall a successful track day. I didn’t do as many laps as usual, though I’m sure I managed to use more fuel.

I also used the datalogger for the first time. I really wanted it for oil pressure readings but I’ve not managed to get the sensor working yet. Looks like I hit a max speed of 106.7mph, probably around 10mph more than before. Max acceleration of 0.6g, max deceleration of -1.2g (no wonder the battery ripped itself out last year) and a max lat force of 1.08g.

Posted in Uncategorized | 1 Comment

Throttle return spring

With a week to go before the trackday, and the car MOT’d, I turned my attention to trying to resolve this sticking throttle issue. From searching the internet, I could see that it was the return springs just not being strong enough to hold the plates closed against the vacuum of a car engine. I couldn’t find any uprated springs, but I did find a solution in America that mimicked the return cable on the bike. It basically had a small cable attached to the throttle cam which in turn was attached to a spring, and it all bolted nicely to the cable routing. Unfortunately I would never be able to get it in time, so I decided to try and knock something similar up myself.

I popped into Halfords and picked up a bike brake cable, and some of the electrical connectors that I hate. I used some spare vacuum hose for an outer cable, filed down the end so it would fit in the throttle cam and made a loop at the other end so I could hook it onto a spring. This also made it adjustable, albeit it not easily.

I used an old cam tensioner spring and hooked it onto a bolt mounted in the inlet manifold support bracket position… then hooked the cable over the end.

I fired the engine up and the throttle closed every time after blipping with no delay. It was a bit stiff (that spring is quite strong) and so it wasn’t comfortable but at least it was closing now.

On the drive to the track it worked well, and I could feather the throttle as I pleased. For the first mile… until I put my foot down. That must have made everything settle because I still had the stiff throttle, but now it wasn’t closing just like before. Doh! I had a look at the track and it all looked as before. During the course of the day, it would sometimes work and sometimes not. Right idea it seemed, but needed refining.

The following week I picked up a box of springs from Halfords. I found the one that stretched the most (strangely not the longest one), fitted that and adjusted the cable. Throttle was much lighter now, certainly more ‘normal. When I drove the Westfield to work on the Friday I noticed that on the way home the throttle was closing, but it seemed there was a slight delay in doing so. By the time I got home, the throttle wasn’t closing too well at all. I think I’ve stretched the spring so will try another type.

Posted in Performance upgrades | Leave a comment

Mapping complete. Results in.

Loaded the car on the trailer this morning and took it down to Nick at Skuzzle Motorsport. We managed to get the bodies balanced on the butterflies themselves though it’s something I’ll have to keep an eye on. It wouldn’t affect full throttle so it was good to get mapping.

It didn’t take too long to map, apparently there wasn’t a need to revisit cells or some other terminology. By lunchtime, Nick came out with a smile on his face.

PowerGraph

That’s 148.6bhp at the wheels, or around 167-170 at the fly. I’m quite pleased with that result, I was only expecting around 150 at the fly and I’ve pretty much gotten that at the wheels. The shape of the graph is also pretty good. There’s a minor dip just after 5.5k rpm which Nick suggested as most likely a misfire. He recommended trying iridium plugs so I’ll give them a go.

Can’t wait to see what it drives like at the track day next Friday. Small matter of an MOT first. Will deal with that in the week, going to have a break from the garage for now.

Posted in Performance upgrades | 1 Comment